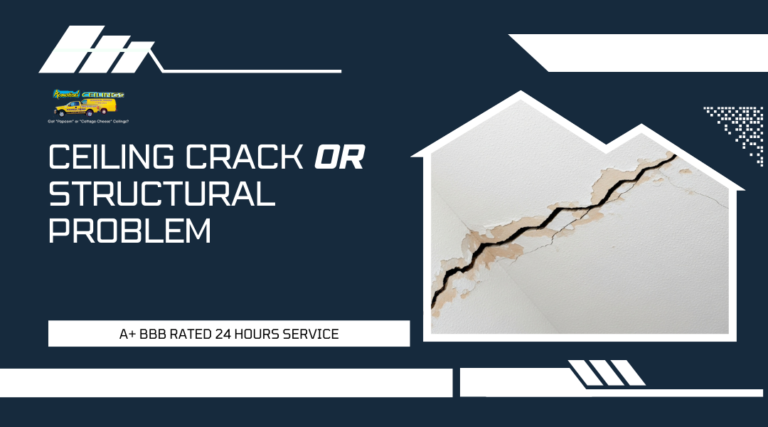
Water damage on your ceiling can start small but grow into a major problem fast. A tiny stain or slight discoloration might seem harmless at first, but these early warning signs often point to bigger issues hiding above. If left unchecked, water damage can lead to mold growth, weakened structures, and expensive repairs that affect your entire home.
The key to protecting your home is catching ceiling water damage in its earliest stages, before it spreads and causes serious harm. Knowing what to look for can help you act quickly and avoid thousands of dollars in future repairs. Small changes in your ceiling’s appearance or texture are often the first clues that water is seeping in from somewhere above.
This guide will walk you through the early warning signs of ceiling water damage and show you what causes it. You’ll learn how to spot problems before they get worse, where to look for the source of leaks, and what steps to take right away. You’ll also discover ways to prevent water damage from happening in the first place.
Why Identifying Ceiling Water Damage Early Matters
Catching ceiling water damage early prevents expensive repairs, protects your family’s health, and maintains your home’s structural strength. Waiting too long to address water issues can turn a small problem into a major crisis.
Consequences of Neglecting Early Signs
When you ignore early warning signs like small stains or slight discoloration, the damage spreads quickly through your ceiling materials. A minor leak can grow into a major problem within days or weeks.
The longer water sits in your ceiling, the more expensive repairs become. What starts as a simple patch job can turn into replacing entire sections of drywall, insulation, and framing. You might need to repair damaged electrical wiring or plumbing that runs through affected areas.
Your repair costs can jump from a few hundred dollars to several thousand when you delay action. Insurance companies may also deny claims if they determine you neglected obvious signs of damage over time. Quick response saves money and protects your coverage.
Potential Health Risks
Mold begins growing in damp ceiling materials within 24 to 48 hours of water exposure. These mold spores spread through your home’s air, affecting everyone who breathes them in.
You and your family may experience respiratory problems, allergies, and asthma symptoms from mold exposure. People with weakened immune systems, young children, and elderly family members face greater health risks. Common symptoms include coughing, sneezing, headaches, and breathing difficulties.
Some mold types release toxic substances that cause serious health problems. Black mold, which often appears in water-damaged areas, can lead to severe respiratory issues and neurological symptoms.
Impact on Structural Integrity
Water weakens the materials that hold your ceiling together. Drywall becomes soft and loses its strength. Wood framing absorbs moisture and begins to rot.
Your ceiling may start to sag or bulge as water accumulates in the materials. This creates a dangerous situation where sections could collapse without warning. The weight of trapped water puts stress on ceiling joists and support beams.
Structural damage spreads beyond just the ceiling. Water travels along beams and into walls, weakening your home’s framework. Support posts and load-bearing walls can lose their strength when exposed to ongoing moisture.
Metal fasteners and fixtures rust when exposed to water. This corrosion weakens connections between structural elements and can lead to sudden failures.
Common Causes of Ceiling Water Damage
Water damage on your ceiling typically comes from three main sources: problems with your roof and gutters, issues with your plumbing system, or failures in your home’s ventilation and HVAC equipment. Understanding these causes helps you identify where to look when you spot water stains or other damage on your ceiling.
Roof Leaks and Clogged Gutters
Roof leaks are one of the most common sources of ceiling water damage. Missing or damaged shingles allow rainwater to seep through your roof and into your attic or ceiling space. Even small gaps around chimneys, vents, or skylights can create entry points for water intrusion.
Clogged gutters make roof leaks worse. When leaves and debris block your gutters, water backs up and pools along your roofline. This standing water can work its way under shingles and into your home.
You should inspect your roof twice a year for damaged or missing shingles. Check gutters every few months and clean them to prevent blockages. Pay special attention after heavy storms or high winds, as these events often cause roof damage that leads to leaks.
Plumbing Leaks and Failures
Plumbing problems above your ceiling cause water to drip down and saturate ceiling materials. Burst pipes, loose connections, and worn-out seals all lead to water damage. Supply lines under constant pressure pose the biggest risk because they can leak large amounts of water quickly.
Common plumbing issues include:
- Corroded or aging pipes that develop cracks
- Loose pipe fittings and connections
- Failed toilet wax rings in upstairs bathrooms
- Leaking shower pans or bathtub overflows
- Malfunctioning water heater connections
You may not see plumbing leaks right away because they often start small. A slow drip behind a wall can damage your ceiling for weeks before you notice stains or other visible signs.
Ventilation and HVAC Issues
Poor ventilation creates moisture buildup that damages ceilings from the inside. Bathrooms and kitchens without proper exhaust fans trap humid air, which condenses on cool ceiling surfaces. This condensation soaks into drywall and insulation over time.
Your HVAC system can also cause ceiling water damage. Clogged condensate drain lines cause water to back up and overflow. Ductwork with poor insulation develops condensation that drips onto ceilings below.
Attic ventilation problems are particularly troublesome. Without adequate airflow, warm moist air gets trapped and condenses on the underside of your roof deck. This moisture then drips down onto ceiling materials.
Recognizing the Early Signs of Ceiling Water Damage
Water damage rarely appears overnight, and knowing what to look for can help you catch problems before they worsen. Discoloration, paint issues, and unusual smells are the most reliable indicators that moisture is affecting your ceiling.
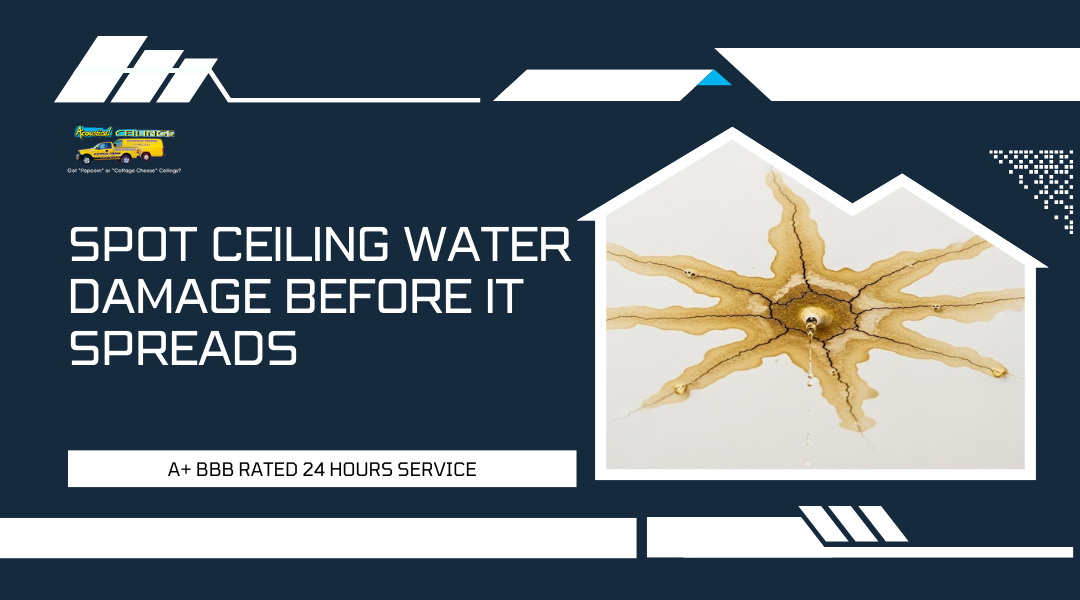
Discoloration and Water Stains
Water stains appear as yellowish, brown, or dark patches on your ceiling surface. These marks often start small but grow larger as moisture continues to accumulate. The stains typically have irregular shapes and may show rings or circular patterns.
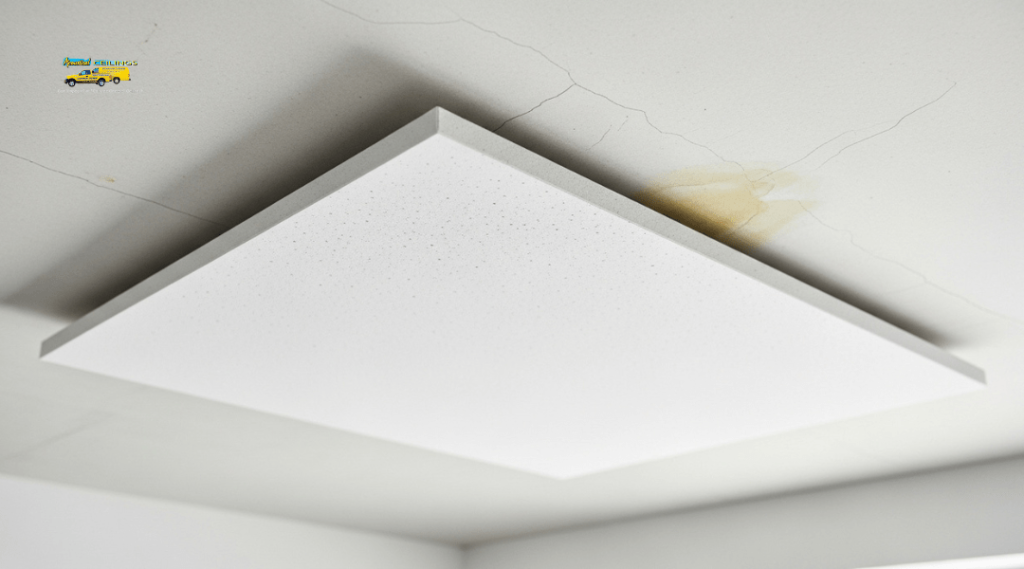
You might notice the discoloration appears lighter at first, then darkens over time. Fresh water stains usually look wet or glossy, while older ones appear dried and crusty. The color can range from light tan to deep brown depending on the water source and minerals present.
Look for stains near corners, around light fixtures, or along seams where ceiling panels meet. These areas are common entry points for water. If you spot any discoloration, mark its size and check it regularly to see if it grows.
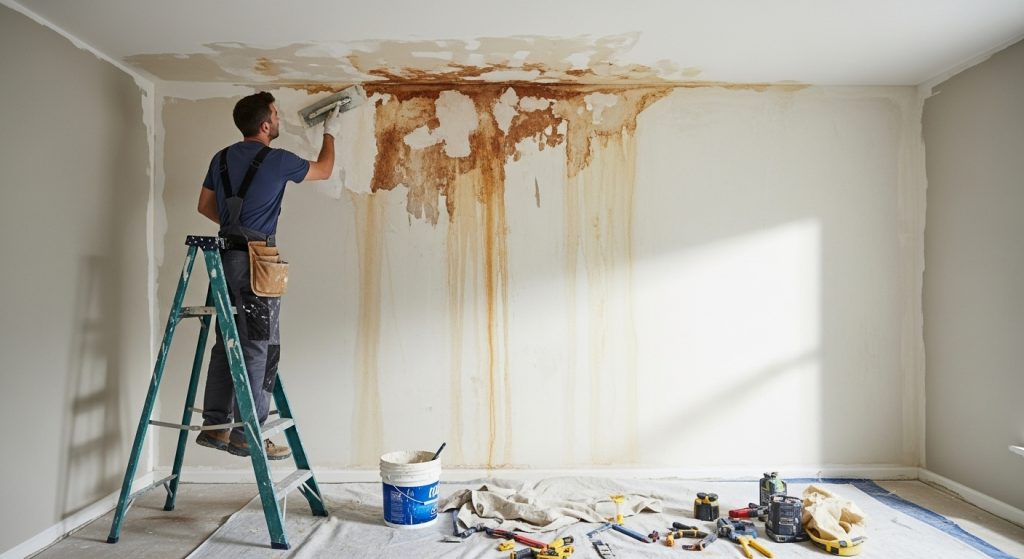
Peeling or Bubbling Paint
Paint loses its grip on ceiling surfaces when water gets trapped underneath. You will see bubbles forming as moisture pushes the paint away from the surface. These bubbles can be small or quite large, depending on how much water has collected.
Peeling paint often starts at the edges of water stains and spreads outward. The paint may crack, curl, or fall off in flakes or strips. Sometimes the paint looks loose but hasn’t peeled yet, creating a wrinkled appearance.
Common signs include:
- Paint that feels soft or spongy when touched
- Visible air pockets under the surface
- Chips or flakes falling from the ceiling
- Cracking patterns that spread from one area
These paint problems signal active moisture issues that need attention.
Musty or Damp Odors
A musty smell is often your first warning of ceiling water damage, even before visible signs appear. This odor comes from mold and mildew growth in damp areas. The smell is earthy, stale, and unpleasant.
Musty odors become stronger in rooms with poor air circulation. You might notice the smell more when you enter a room after being away or during humid weather. The odor can indicate hidden water damage behind or above the ceiling surface.
Pay attention if the musty smell gets worse near specific ceiling areas. This helps you pinpoint the water damage location. The presence of musty odors means moisture has been present long enough for organic growth to start, making quick action important.
Visible and Physical Signs to Watch For
Ceiling water damage leaves distinct physical marks that you can identify through careful observation. These signs range from structural changes like sagging to surface issues such as dampness and mold.
Sagging or Warped Ceiling
A sagging ceiling signals serious water accumulation above the surface. When water collects on top of drywall or plaster, the material absorbs moisture and becomes heavy. This weight causes the ceiling to bow downward or develop visible dips.
You’ll notice sections that appear lower than surrounding areas. The affected spots may look curved or uneven. Press lightly on suspicious areas—if the ceiling feels soft or spongy, water has compromised its structure.
Sagging represents advanced water damage that threatens structural issues. The ceiling material has absorbed significant moisture over time. This warning sign requires immediate attention because the ceiling could collapse if water continues to accumulate.
Soft Spots or Dampness
Soft spots indicate water has penetrated your ceiling material but hasn’t caused visible sagging yet. Run your hand gently across the ceiling surface in areas where you suspect problems. Damaged sections will feel different from dry areas.
Signs of dampness include:
- Sections that feel cool to the touch
- Areas that give slightly under light pressure
- Surfaces that remain moist for extended periods
- Ceiling material that feels spongy or weak
A damp smell often accompanies soft spots. This musty odor suggests moisture has been present long enough to affect the material. The smell may be strongest in bathrooms, kitchens, or rooms directly below plumbing.
Active Dripping or Watermarks
Dripping water marks the most obvious sign of ceiling damage. You’ll see water actively falling from the ceiling or pooling on the floor below. This happens during heavy rain or when pipes leak.
Watermarks appear as discolored patches on your ceiling. These stains show up as yellow, brown, or dark spots. Fresh watermarks look darker and may have wet rings around the edges. Older stains appear faded but show where water entered previously.
Watch for watermarks that grow larger over time. This growth means the leak continues even when you don’t see active dripping. Stains near light fixtures or in corners indicate water following electrical lines or structural supports.
Presence of Mold Growth
Mold growth confirms that moisture has been present for at least 24 to 48 hours. You’ll spot mold as black, dark green, or white patches on your ceiling surface. These spots typically appear fuzzy or powdery.
Common locations for mold include corners, around vents, and near bathroom fixtures. The growth spreads outward from the moisture source. Small spots can expand quickly if you don’t address the water problem.
Mold appears in several forms:
- Black spots clustered together
- Green patches with fuzzy texture
- White powdery residue
- Dark streaks spreading from one area
Mold growth poses health risks beyond structural damage. It releases spores into your air that can cause respiratory problems. The presence of mold means water damage has progressed beyond the initial stages.
How to Investigate and Identify the Source
Finding where water is coming from requires a step-by-step approach that checks the most common sources of water intrusion. You need to examine plumbing systems, roof structures, and ventilation components to pinpoint the exact location of the problem.
Narrowing Down the Leak Location
Start by looking at the location of the ceiling damage. If the stains appear directly below a bathroom or kitchen, plumbing leaks are the most likely cause. Check the rooms and fixtures above the damaged ceiling first.
Pay attention to the pattern of water damage. A single concentrated spot usually means a pipe leak or fixture issue. Multiple stains or damage along a ceiling line often point to roof problems or issues with exterior walls.
Document when the damage appears or gets worse. If stains show up during or after rain, you’re dealing with roof-related water intrusion. Damage that grows regardless of weather typically means an internal plumbing issue.
Use a moisture meter to detect hidden water in walls and ceilings near the visible damage. This tool helps you trace the water path back to its source without creating unnecessary holes.
Differentiating Between Plumbing and Roof Issues
Plumbing leaks create specific patterns you can recognize. Check supply lines, drain pipes, and fixtures in rooms above the damage. Look for water stains around toilets, sinks, and bathtubs on upper floors.
A roof leak usually shows up near the ceiling edges or follows roof valleys and penetrations. Water from the roof travels along rafters before dripping, so the ceiling damage may not appear directly under the actual roof hole.
Examine your attic space during and after rain. Fresh water drips or damp insulation confirm a roof leak. Dry conditions in the attic during rain mean your problem is likely plumbing-related.
Test your theory by running water through specific fixtures while someone watches the damaged area. If water appears when you use certain plumbing, you’ve found your source.
Checking Ventilation and HVAC Systems
Poor ventilation creates condensation that mimics leak damage. Check bathroom and kitchen exhaust fans to make sure they vent outside, not into your attic. Blocked or disconnected ducts trap moisture inside.
Inspect HVAC ductwork in attics and crawl spaces for condensation buildup. Cold air moving through warm, humid spaces creates water droplets that drip onto ceilings. Look for wet insulation around ducts or moisture on duct surfaces.
Check attic ventilation by comparing indoor and outdoor temperatures. An attic that’s much warmer than outside air needs better airflow. Install or clear soffit vents and ridge vents to reduce moisture accumulation.
First Steps to Take After Discovering Signs
Once you spot water damage on your ceiling, quick action helps prevent the problem from getting worse and protects your home from additional harm. You need to secure the area, record what you see, and decide if you need expert help.
Immediate Containment and Safety
Move furniture, electronics, and valuables away from the affected area right away. Water can drip through damaged ceilings without warning, so clearing the space below protects your belongings from damage.
Turn off electricity to rooms with ceiling water damage if you can do so safely. Water and electricity create dangerous conditions. If you cannot reach the breaker box safely or if water is actively dripping near electrical fixtures, leave the area and contact an electrician.
Place buckets or containers under any active leaks to catch water. This simple step prevents water from spreading across your floors and into lower levels of your home. Use towels or tarps to protect flooring around the damaged area.
Check if the ceiling feels soft or sagging. A ceiling that bulges or feels spongy could collapse. Keep people and pets away from rooms with severely damaged ceilings until a professional inspects the structure.
Documenting Damage for Restoration
Take clear photos and videos of all water damage before you clean up or make repairs. Capture close-up shots of stains, bulging areas, peeling paint, and any visible mold growth. Document the full extent of the damage from multiple angles.
Key items to photograph:
- Ceiling stains and discoloration
- Warped or sagging areas
- Peeling paint or wallpaper
- Visible mold spots
- Water pooling on floors
- Damaged furniture or belongings
Write down when you first noticed the damage and any events that might have caused it. Note details like recent storms, plumbing work, or appliance use. This information helps water damage restoration services identify the source and plan repairs.
Keep receipts for any emergency supplies you purchase, such as buckets, tarps, or dehumidifiers. Your insurance company may reimburse these costs as part of your claim.
When to Call Professional Services
Contact professional water damage restoration services immediately if you see active leaks, large stained areas, or mold growth. Professionals have specialized equipment like industrial dehumidifiers and moisture meters that dry structures thoroughly and prevent future problems.
Call experts right away if the damage covers more than a few square feet. Large areas of water damage require professional assessment because moisture often spreads behind surfaces where you cannot see it. Hidden moisture leads to mold growth and structural issues if not properly dried.
Reach out to a water damage restoration company if you smell musty odors even without visible damage. These smells indicate moisture trapped inside walls or ceilings. Professional water damage restoration teams use thermal imaging cameras to locate hidden water sources.
You should also contact professionals if the water came from contaminated sources like sewage backups or flooding. This type of water requires special cleaning methods to protect your health and safety.
Preventing Future Ceiling Water Damage
Taking steps to prevent water damage saves you money and protects your home’s structure. Regular maintenance of your roof, gutters, plumbing, and ventilation systems stops problems before they start.
Routine Inspections and Maintenance
Check your ceilings every few months for early warning signs. Look for small stains, discoloration, or any changes in texture that might signal moisture problems.
Schedule professional inspections at least once a year. A trained expert can spot issues you might miss, like hidden leaks or weak spots in your ceiling structure.
Pay attention to areas under bathrooms, kitchens, and water heaters. These spots are most likely to develop leaks because of the plumbing above them.
After heavy storms or extreme weather, inspect your ceilings right away. Water can seep in during severe conditions and cause damage that gets worse over time.
Keep records of your inspections and any repairs. This helps you track problem areas and catch patterns that might indicate bigger structural issues.
Managing Roof and Gutter Health
Clean your gutters at least twice a year, in spring and fall. Clogged gutters cause water to overflow and seep into your roof and ceiling spaces.
Remove leaves, branches, and debris that block water flow. Install gutter guards to reduce how often you need to clean them.
Inspect your roof for missing, damaged, or curled shingles. Replace problem shingles quickly to prevent roof leaks from developing.
Check the flashing around chimneys, vents, and skylights. Damaged flashing is a common entry point for water that leads to ceiling damage.
Trim tree branches that hang over your roof. Branches drop debris into gutters and can damage shingles during storms.
Upgrading Plumbing and Ventilation
Replace old or corroded pipes before they burst. Most pipes last 20 to 50 years depending on the material, so check their age and condition.
Install water leak detectors near appliances and plumbing fixtures. These devices alert you to leaks before they cause serious ceiling damage.
Improve ventilation in bathrooms and kitchens with exhaust fans. Poor ventilation traps moisture that can damage ceilings over time.
Run exhaust fans during and after showers for at least 15 minutes. This removes excess humidity that can soak into ceiling materials.
Check your attic ventilation to prevent condensation buildup. Proper airflow keeps moisture from collecting on the underside of your roof and ceiling.
Insulate pipes in unheated areas to prevent freezing and bursting. Frozen pipes are a major cause of sudden water damage in colder months.