Textured ceilings can transform any room, adding character and style to your home or business. This guide will explore popular textured ceiling styles and finishes, helping you understand how to enhance your space effectively. Whether you’re considering a renovation or simply seeking to refresh your interiors, knowing your options can make a significant difference.
Acoustical ceilings offer a wide range of textures, each providing unique visual appeal and functionality. From classic popcorn styles to sleek modern designs, you can choose what best fits your taste and space needs. This variety allows you to personalize your environment, while also addressing practical concerns like sound absorption and insulation.
As you read through this guide, you will gain insights into different textures and finishes, along with tips for achieving the perfect look for your ceilings. Understanding these options empowers you to make informed decisions that enhance the beauty and comfort of your interiors.
The Most Popular Textured Ceiling Styles
Textured ceilings can enhance the beauty of any room while also hiding imperfections. Here are some of the most sought-after styles, each offering unique characteristics and benefits to elevate your ceiling design.
Popcorn Ceilings: Classic and Cost-Effective
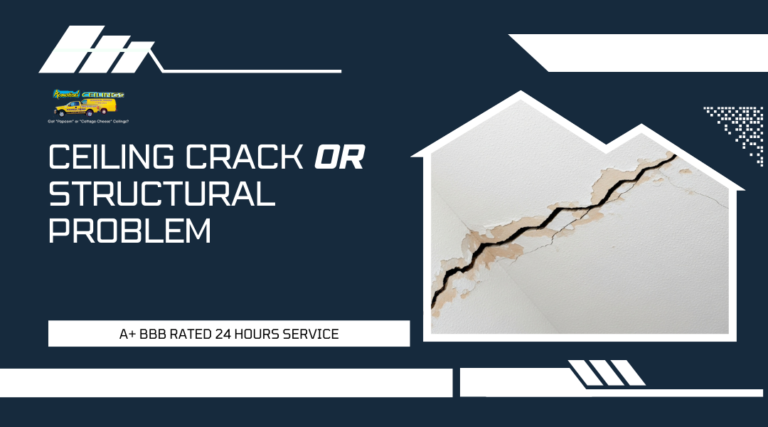
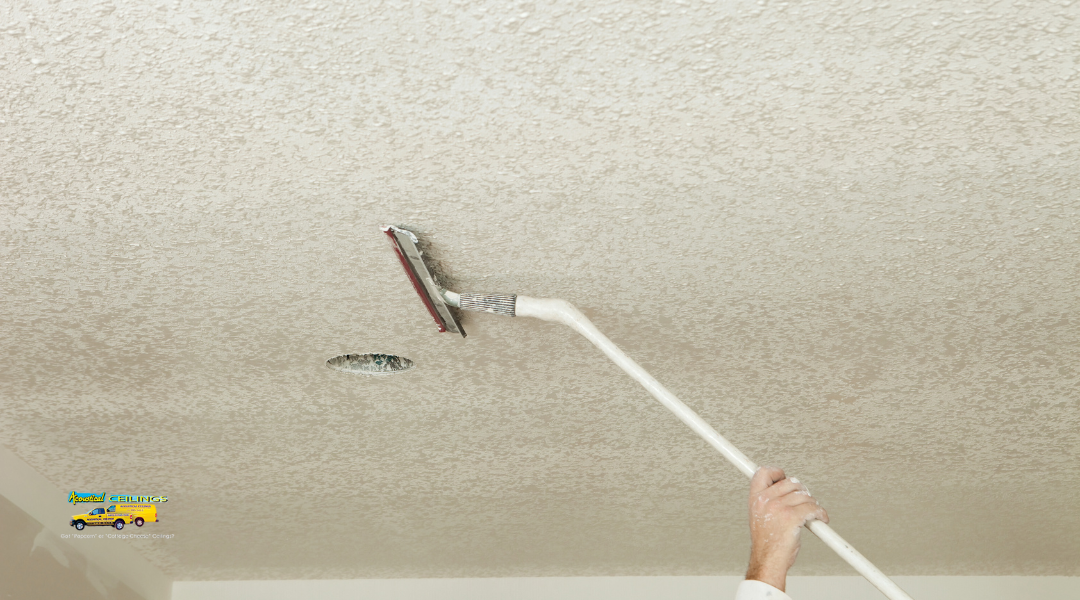
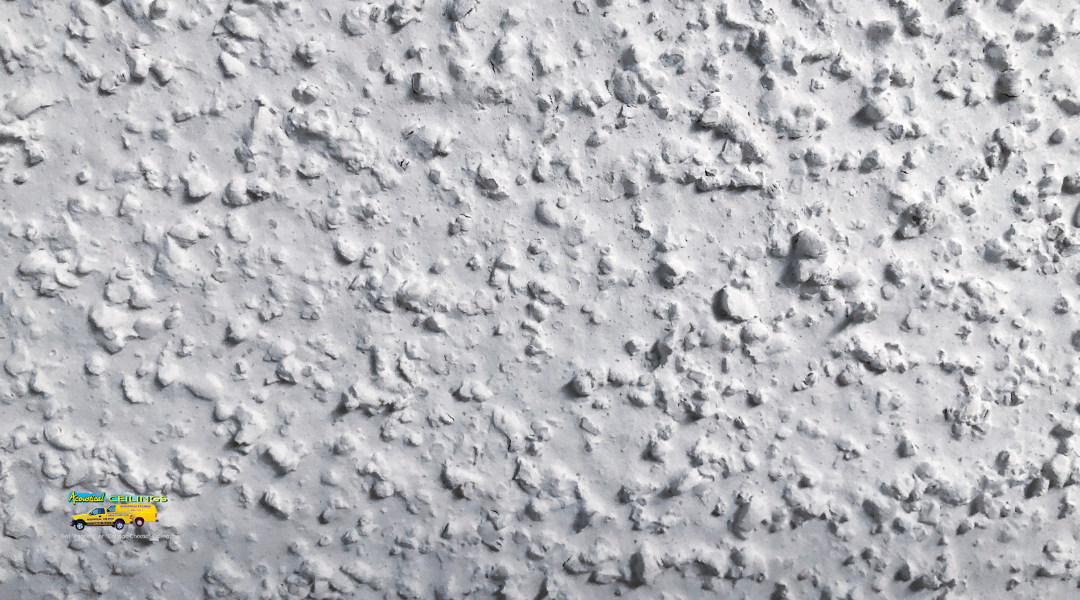
Popcorn ceilings, once a popular choice in many homes, provide a distinctive, bumpy texture. They are known for their ability to hide imperfections and absorb sound, making them ideal for minimizing noise.
To install a popcorn ceiling, a special spray technique is used, creating a rough surface. This style is usually more affordable than smoother finishes.
However, maintenance can be tricky, as cleaning may require special care to avoid damaging the texture. If you’re planning to remodel, consider whether this classic look fits your vision.
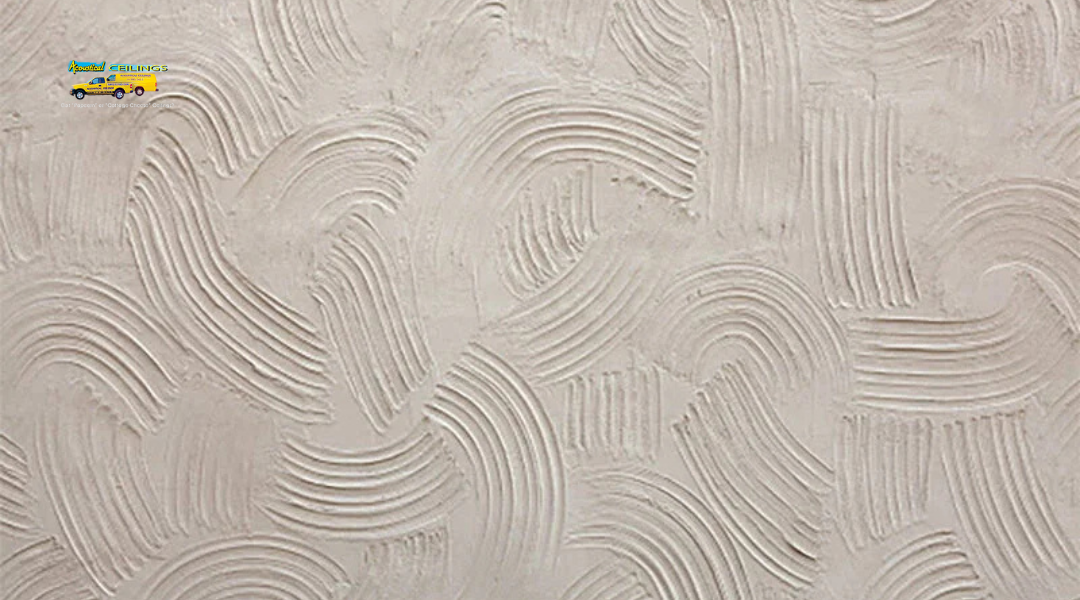
Knockdown Ceilings: Subtle and Sophisticated
Knockdown ceilings feature a texture that is less pronounced than popcorn. This style involves spraying a compound on the surface and then “knocking it down” with a trowel.
The end result is a sophisticated, subtle texture that adds depth without overwhelming the eye. This finish is popular in modern designs and works well in both large and small spaces.
Knockdown ceilings are also relatively easy to clean and maintain, making them a practical choice. They offer an elegant feel that can complement stylish ceilings in various decor settings.
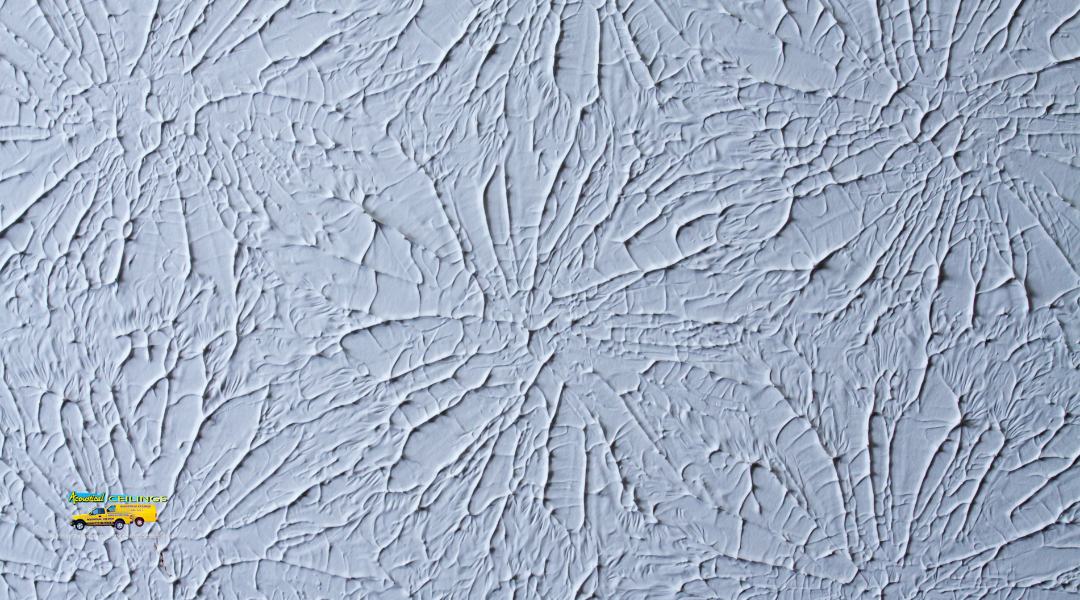
Swirl Ceilings: Adding Dynamic Visual Interest
Swirl ceilings are characterized by a unique, swirling pattern that creates dynamic visual interest. This style can make your ceiling appear more lively and artistic.
To achieve this look, a textured compound is applied and manipulated to form swirls. The pattern can be customized to suit your taste, ranging from tight swirls to wider, bolder designs.
While swirl ceilings may require more meticulous installation than simpler styles, they can be a brilliant centerpiece. This option is perfect for those looking to make a bold statement in their home.
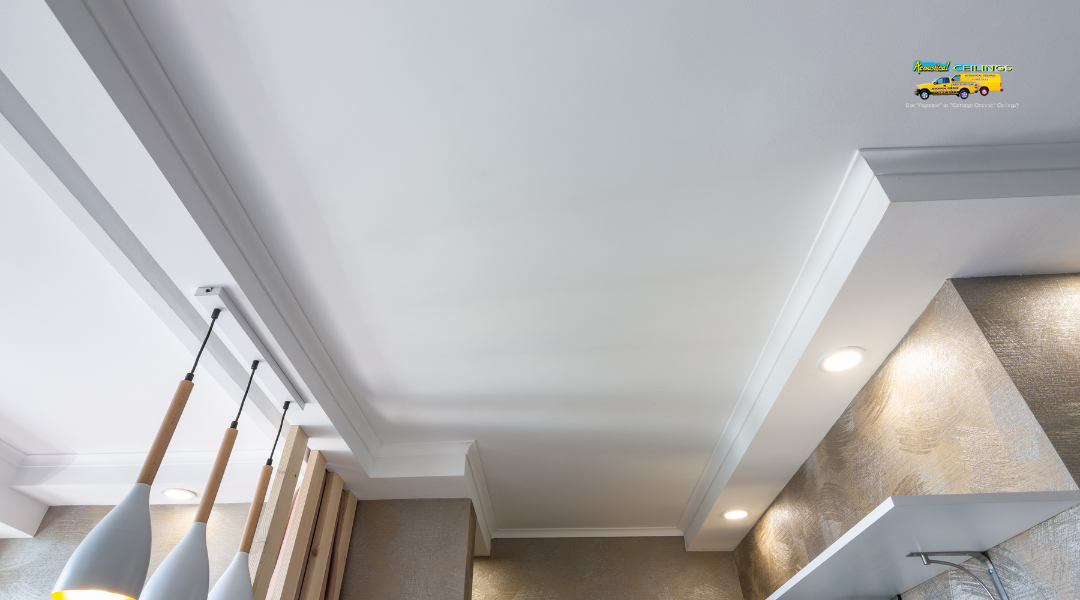
Smooth Ceilings: Sleek and Modern Appeal
Smooth ceilings have a clean, modern look that suits contemporary homes. This style creates a seamless surface, making your space appear larger and more open.
Installation of smooth ceilings typically involves drywall or plastering techniques. This finish is also easy to paint, allowing for a variety of colors and styles to match your decor.
Maintenance is straightforward—simply wipe them down to remove dust and grime. If you prefer a minimalist aesthetic, smooth ceilings might be the ideal choice for you.
Stippled Ceilings: Traditional and Textured
Stippled ceilings offer a traditional look, featuring tiny dots of texture that create a unique design. This style is often chosen for its ability to add character without being too overwhelming.
The stippling technique can vary, resulting in different levels of texture. Many homeowners appreciate that stippled ceilings can hide minor flaws, like cracks or uneven surfaces.
Although they are not as commonly seen today, they still hold appeal. If you appreciate traditional design elements, stippled ceilings can add warmth and history to your spaces.
Choosing the Right Textured Ceiling for Your Space
When selecting a textured ceiling, you should consider factors such as room size, the functionality of the space, and how the ceiling style integrates with your overall interior design. These choices can enhance your aesthetic while improving acoustics and ambiance.
Consider Room Size and Functionality
The size of your room plays a crucial role in determining the right textured ceiling. In smaller spaces, lighter textures can create an illusion of spaciousness. Opt for a subtle finish, like a light orange peel texture, which does not overwhelm the room.
In larger areas, bolder textures, such as popcorn or knockdown ceilings, can add depth and character. Consider the room’s function as well. For example, in a home theater, a textured ceiling can help absorb sound. In contrast, a kitchen might benefit from a more streamlined look that reflects cleanliness.
Match the Ceiling Style with Interior Design
Your textured ceiling should complement your interior design theme. For a modern look, consider sleek textures that add depth without being too busy. A crisp, smooth ceiling paired with recessed lighting can create a sophisticated and contemporary vibe.
For traditional spaces, textured ceilings with more detail, like coffered or ornate designs, can enhance the vintage aesthetic. Ensure the color of the textured ceiling aligns with your walls and furnishings to create a cohesive look. Warm tones can make a space feel cozy, while cool colors can lend an airy feel.
How to Blend Textured Ceilings with Other Design Elements
Integrating textured ceilings with other design elements requires careful planning. Start by focusing on the color scheme. Choose colors that either match or complement your ceiling texture to avoid visual dissonance.
Consider incorporating fixtures and features that enhance the texture. A well-placed chandelier or decorative pendant can draw attention to a unique ceiling. Layered lighting options can also highlight the texture and add depth to the room.
Finally, think about how furniture placement affects your ceiling design. Arrange your furniture to guide the eye upwards, inviting appreciation of the ceiling’s texture. This combination will create a harmonious environment that feels intentional and complete.
How to Install Textured Ceilings: A Step-by-Step Guide
Installing a textured ceiling can enhance the aesthetic of any room while also improving acoustics. This guide outlines the necessary preparations, application processes, and final steps to ensure a successful installation.
Preparation: Tools and Materials You Need
Before starting your textured ceiling installation, gather all the necessary tools and materials. Here’s a list to help you:
Tools:
- Ladder
- Paint roller and tray
- Spray gun (for some textures)
- Trowel or putty knife
- Drywall knife
- Sandpaper or sanding block
Materials:
- Ceiling paint or primer
- Texture product (such as popcorn or knockdown texture)
- Drop cloths to protect floors and furniture
- Masking tape
Having everything ready will make your installation smoother and quicker.
Step 1: Apply the Ceiling Base or Primer
Begin by preparing the ceiling surface. If it is new drywall, make sure it is clean and dust-free. Then, apply a coat of primer or ceiling paint. This base layer helps the texture adhere better and ensures a uniform appearance.
Use a paint roller to cover larger areas, and a brush for edges and corners. Allow the primer to dry completely, as this step is crucial for proper texture application. Depending on your product, drying times can vary, so always check the label for specific instructions.
Step 2: Choose and Apply the Texture
Select the texture type that fits your design preference. Options include popcorn, knockdown, or slap brush. Each texture gives a distinct look and feel to your ceiling.
Once you make your choice, mix your texture compound as per the manufacturer’s instructions. If using a spray gun, ensure it is set correctly for the desired effect. For manual application, use a trowel or roller.
Start applying the texture from one corner and work your way across. Aim for even coverage, adjusting pressure as needed to achieve the desired look. Don’t forget to cover the edges with masking tape to keep them clean.
Step 3: Finishing Touches and Drying Time
After applying the texture, allow it to dry thoroughly. This can take several hours or even days, depending on the product used and the humidity levels in your space.
Once dry, inspect the ceiling for any uneven areas. If necessary, you can lightly sand these spots for a smoother finish.
Finally, consider adding a coat of paint over the textured ceiling for a polished look. Choose a flat or semi-gloss paint that complements your room’s design. Apply with a roller, being careful not to overly disturb the texture.
Following these steps ensures a well-installed textured ceiling, enhancing both style and function in your home.
Textured Ceiling Finishes: Exploring Your Options
Choosing the right textured ceiling finish can significantly enhance the look and feel of your space. Understanding the differences between matte and glossy finishes, exploring faux options, and considering colored textures can help you make an informed decision.
Matte vs. Glossy Finishes: Pros and Cons
Matte finishes provide a subtle look that hides imperfections well. They reduce glare and are often preferred for cozy, inviting spaces. However, matte surfaces can be harder to clean and may absorb more dirt over time.
Glossy finishes, on the other hand, reflect light, which can brighten a room. This makes them ideal for spaces where you want to enhance light and visibility. They are easier to wipe clean, making maintenance simpler.
Ultimately, your choice depends on your aesthetic goals and the specific room requirements. Consider the effects of light and the typical wear in your space when selecting between these two options.
Faux Finishes: Achieving Custom Looks
Faux finishes create the illusion of more expensive materials without the cost. Options like faux wood or stone can add a unique character to your ceiling. Techniques like sponging or rag rolling are often used to mimic these looks.
Using high-quality products, such as those offered by Armstrong Ceilings, can enhance the result. Faux finishes allow for great creativity and personal expression. This can be a fun DIY project or something to discuss with a professional contractor.
Remember that the application process can be intricate, so patience and practice are key to achieving the desired outcome.
Colored Textures: Adding Extra Character to Your Ceiling
Adding color to your ceiling texture can make a bold statement in any room. Soft hues tend to create a calm environment, while vibrant shades can energize your space.
You can use a combination of textured patterns with color for increased visual interest. Consider options like popcorn or orange peel textures, which can be easily colored to match your decor.
Selecting the right color not only enhances your ceiling but also ties the room together. It is essential to choose shades that complement your walls and furnishings. This thoughtful approach to color can transform your ceiling from a mere surface into a focal point.
Expert Tips for Maintaining and Repairing Textured Ceilings
Proper upkeep of textured ceilings can enhance their longevity and appearance. You can keep your ceilings looking great with simple cleaning techniques, effective repair methods for common issues, and tips to prolong their life.
Cleaning Techniques for Different Textures
Cleaning textured ceilings can be tricky due to their unique surface. For lightly textured ceilings, a gentle dusting with a soft cloth or a duster can remove dust effectively.
If your ceiling has a heavier texture, consider using a vacuum with a brush attachment. This can help avoid damaging the surface while ensuring thorough cleaning.
For stains, spot cleaning with a mild soap solution can be effective. Use a soft sponge to gently dab at the stain without trying to scrub too hard. Avoid excess moisture as this can lead to mold or damage.
How to Fix Common Issues (Cracks, Stains, etc.)
You may notice minor cracks or stains on your textured ceiling over time. To fix cracks, start by preparing the area. Clean it and ensure it’s dry.
Apply a joint compound to fill the crack, using a putty knife for a smooth finish. Let it dry completely and then sand lightly if needed. Match the texture by using a spray texture or a sponge to mimic the original pattern.
For stains caused by water damage, it’s crucial to identify the source first. Repair any leaks before addressing the stain. Use a stain-blocking primer followed by paint that matches your ceiling’s color.
Prolonging the Life of Your Textured Ceiling
Regular maintenance can significantly extend the life of your textured ceiling. One key step is to periodically inspect for any signs of water damage or cracks.
Keep the space well-ventilated to reduce humidity, which can lead to mold. You should also avoid using harsh chemicals when cleaning the ceiling, as these can deteriorate the texture over time.
Using painter’s tape to shield edges when painting helps prevent damage to your textured finish. Cleaning regularly with a duster or vacuum can prevent dust buildup, keeping your ceiling looking fresh and new.
Conclusion:
A textured ceiling can enhance the beauty of your home. It adds depth and character to any room. You have various styles to choose from, such as popcorn, knockdown, and orange peel textures.
Each texture offers unique visual effects. For instance, a knockdown finish provides a sophisticated look, while a popcorn ceiling can help with sound absorption. Consider the atmosphere you want to create in your space.
Installing a textured ceiling is also a practical choice. It can hide imperfections in the drywall and is a way to make your ceiling more durable. You may also find that textured finishes require less painting over time.
When selecting a texture, think about your home’s design and your personal style. Do you prefer something classic, rustic, or modern? Take the time to explore your options.
Transforming your ceiling is a step towards elevating the overall appeal of your home. With the right texture, your living space can feel more inviting and stylish. Embrace the beauty of textured ceilings and see the difference it can make in your interior design.