When it comes to upgrading your home or office, drywall installation is a crucial step that can significantly affect the overall appearance and feel of your space. This guide will equip you with essential knowledge on the drywall installation process, helping you make informed decisions for your projects. Whether you are planning a new construction or a renovation, understanding the fundamentals of drywall will save you time and money.
At Acoustical Ceilings, we pride ourselves on our expertise in drywall installation. Our team is dedicated to providing high-quality craftsmanship tailored to your specific needs in Rancho Cucamonga, California. From selecting the right materials to ensuring a seamless finish, we are your trusted partner in transforming your interiors.
Learning about drywall installation can empower you to create the perfect environment in your home. By familiarizing yourself with the steps involved and understanding common challenges, you can achieve outstanding results that meet your expectations and enhance your living or working space.
What Is Drywall?
Drywall is a key material used in construction for creating walls and ceilings. Understanding its basics, types, and popularity can help you make informed decisions for your home improvement projects.
A Quick Overview of Drywall Basics
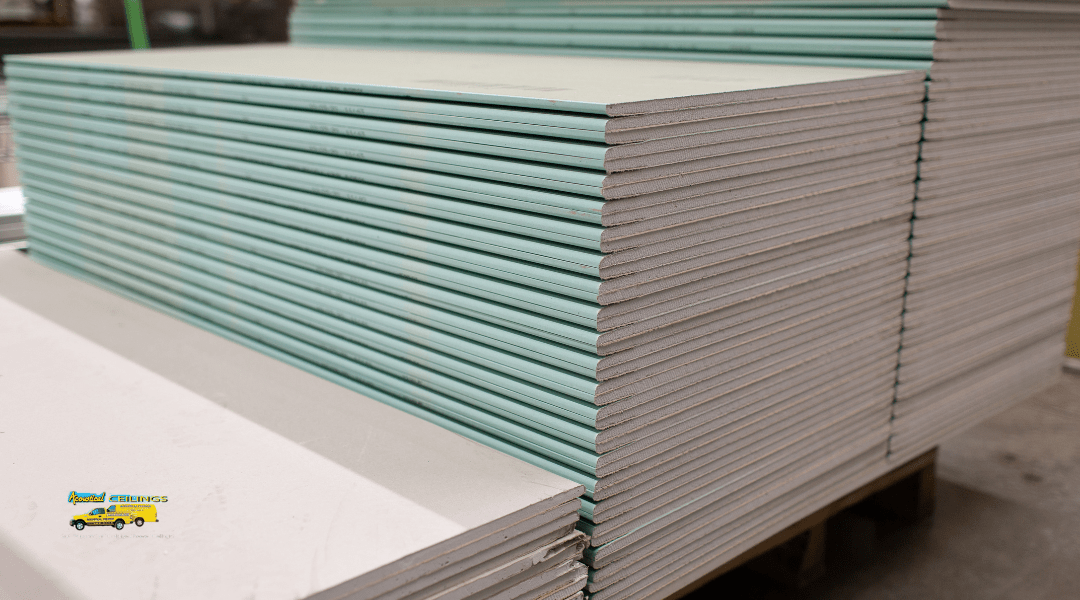
Drywall, also known as gypsum board, is made of gypsum plaster sandwiched between two sheets of thick paper. It is a favored choice for interior wall construction due to its affordability and ease of installation.
Typically available in 4×8 foot sheets, it can be cut to fit various spaces. You attach drywall to wall studs using screws or nails. After installation, it is usually finished with tape and joint compound to create a smooth surface. This process allows for easy painting or wallpapering.
Common Types of Drywall Sheets
There are several types of drywall sheets, and each serves a specific purpose. Here are a few common kinds:
- Regular Drywall: Standard type for most interior walls.
- Moisture-Resistant Drywall: Often used in bathrooms or kitchens to prevent mold and mildew.
- Fire-Resistant Drywall: Designed for areas requiring additional fire safety, such as garages.
- Soundproof Drywall: Helps reduce sound transmission, often used in studios or noisy environments.
Choosing the right type depends on where you plan to install it and the specific conditions of that area.
Why Drywall Is Popular in Modern Construction
Drywall is popular in construction for several reasons. It is cost-effective and reduces labor time compared to traditional plaster walls. Additionally, drywall installation involves less mess and drying time.
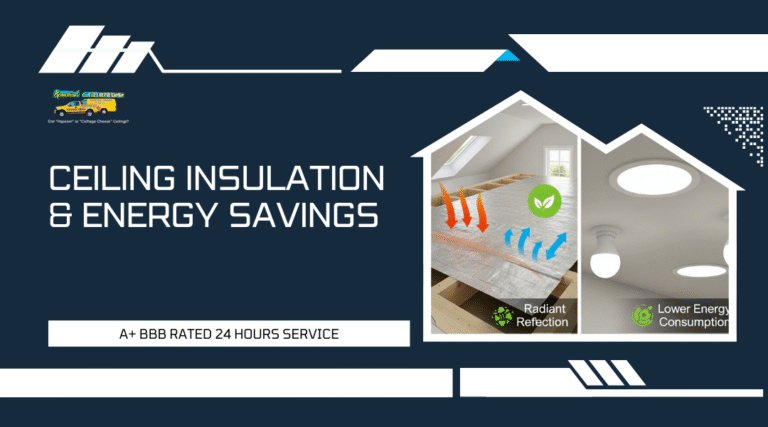
The lightweight nature of drywall makes it easier to transport and handle. Furthermore, it provides good insulation and fire resistance, enhancing the home’s safety and energy efficiency.
Many homeowners and builders prefer drywall for its versatility and ease of customization, allowing for numerous design options. This combination of factors contributes to its widespread use in residential and commercial construction alike.
Tools and Materials You’ll Need
To tackle drywall installation successfully, you need the right tools and materials. This section covers the essential tools, how to choose the right drywall type and thickness, and the necessary fasteners and compounds.
Essential Drywall Installation Tools
When starting your drywall project, having the right tools at hand is crucial. Here’s a list of essential tools you will need:
- Utility Knife: Used for scoring and cutting drywall. A sharp blade ensures clean edges.
- Drywall Saw: Ideal for cutting out electrical boxes and making detailed cuts.
- T-Square: Helps in measuring and marking straight lines accurately.
- Joint Knife: Ideal for applying joint compound efficiently.
- Screw Gun or Drill: Essential for attaching drywall sheets. A screw gun with a depth setting prevents over-sinking screws.
Additionally, consider having a tape measure, straight edge, and sanding block for finishing touches. These tools will make your installation smoother.
Choosing the Right Type and Thickness
Selecting the appropriate drywall type and thickness is vital for your project. Most residential walls use standard 1/2 inch drywall. This thickness offers durability without being too heavy.
For areas with moisture, like bathrooms, choose green board or cement board. These types resist mold and moisture better than standard drywall. If you’re working in a garage or another area that needs increased fire resistance, 5/8 inch fire-rated drywall is the best option.
Remember, if you’re hanging drywall on the ceiling, opting for 5/8 inch thickness adds extra support and less chance of sagging.
Fasteners, Tapes, and Joint Compounds
To secure the drywall, use drywall screws or nails. Screws generally provide a stronger hold. Ensure you choose screw lengths that suit your drywall thickness.
You’ll also need tape and joint compound for finishing. Paper tape is often more reliable than plastic mesh tape for seams. Joint compound comes in various forms, including pre-mixed and powder.
Apply the compound in layers, allowing drying time between applications. Smooth out the surface with a joint knife for a professional finish. This step is crucial for invisible seams.
Preparing for Installation
Before you start your drywall project, it’s crucial to prepare properly. Taking the time to measure, plan, and ensure safety can make a big difference in how smoothly the installation goes.
Measuring and Planning the Layout
Begin by measuring the area where you will install the drywall. Use a tape measure for accurate dimensions and note them down.
- Record the height and width of each wall.
- Calculate the total square footage by multiplying height by width for each wall.
After measuring, plan the layout of the drywall boards.
- Create a diagram of your space. This helps visualize where each board will go.
- Check the framing spacing, which typically should be 16 or 24 inches apart.
This will assist in determining the right board lengths and ensure you are buying the correct amount of material.
Safety Tips for DIY Drywall Work
Safety should always be your top priority when working on a drywall project. Here are some essential tips to follow:
- Wear protective gear. Use safety goggles, gloves, and a dust mask to protect against debris and dust.
- Keep the workspace clean. Clear the area of unnecessary items to prevent tripping hazards.
- Use proper lifting techniques. Drywall sheets can be heavy. Lift with your legs and keep the load close to your body.
Being cautious while handling tools and materials will help avoid accidents and injuries.
Checking Wall Framing and Insulation
It’s vital to inspect the wall framing and any insulation before you begin installing drywall. Start by looking for any defects or damage in the framing.
- Check for straightness of the studs. Any bowing can affect how the drywall hangs.
- Ensure that there is adequate support wherever the drywall will be attached.
If your walls have insulation, make sure it is properly installed.
- Insulation should fill the cavities completely without gaps.
- This ensures better energy efficiency and sound control.
Taking these steps helps create a solid foundation for your drywall installation.
Step-by-Step Drywall Installation Process
Installing drywall involves several important steps to ensure a smooth and sturdy finish. You will need to cut the panels to size, secure them properly, and finish the surface. Here’s how to do it effectively.
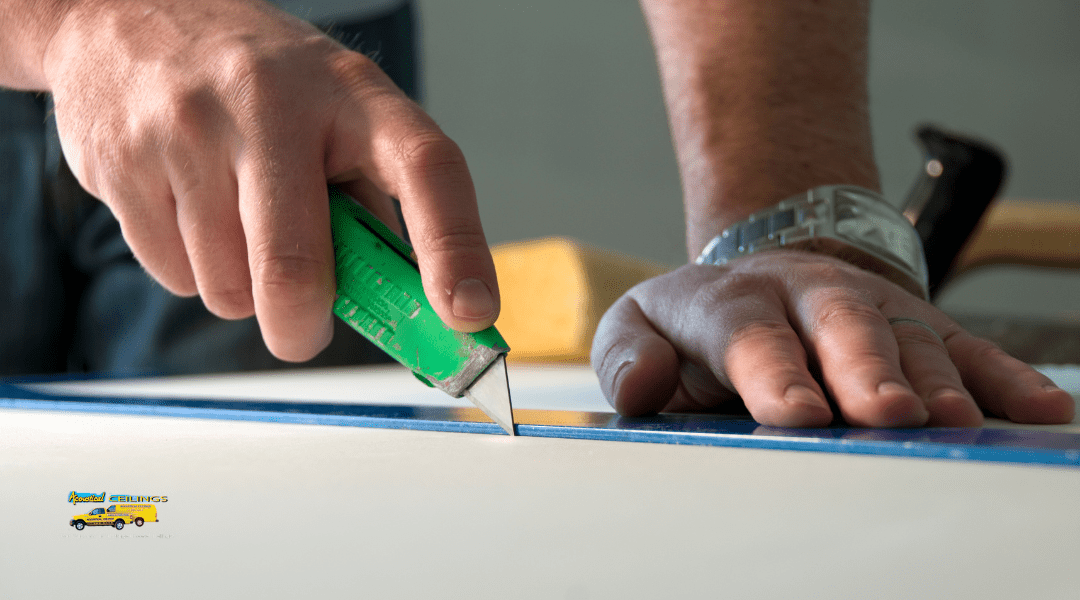
Step 1: Cutting Drywall Panels to Size
Begin by measuring the space where you will install the drywall. Use a tape measure to get accurate dimensions. Mark the measurements on the drywall sheet with a pencil.
To cut the drywall, score the front side with a utility knife, making a single, deep cut along your marked line. Next, snap the drywall along the score line. Then, cut through the paper backing. Always wear safety goggles to protect your eyes from dust and debris.
Cutting panels properly will make the installation process smoother. Make sure to cut enough panels to cover your entire area, leaving space for windows and doors.
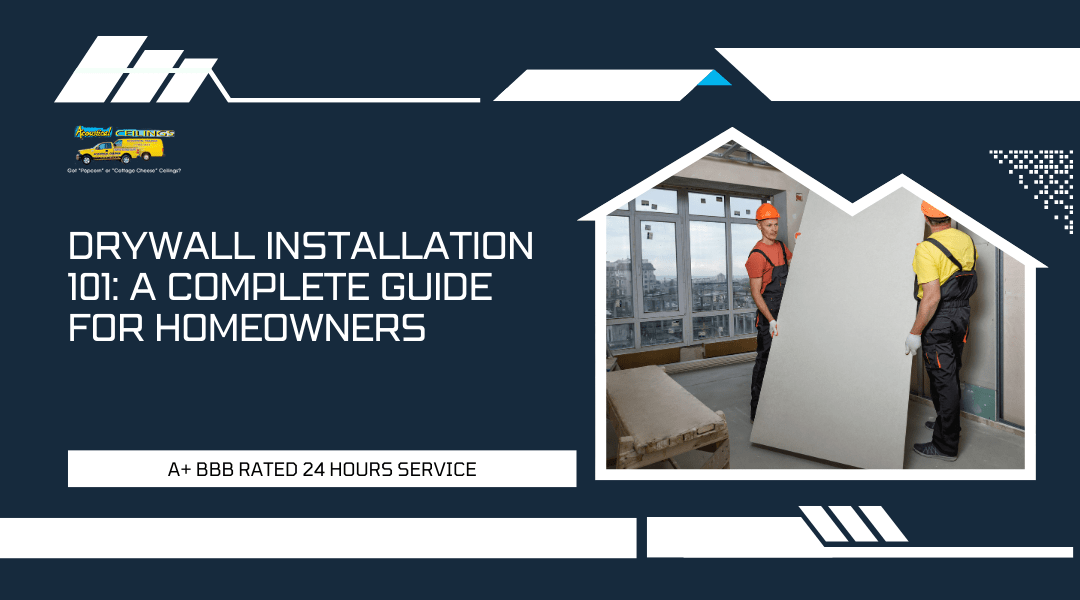
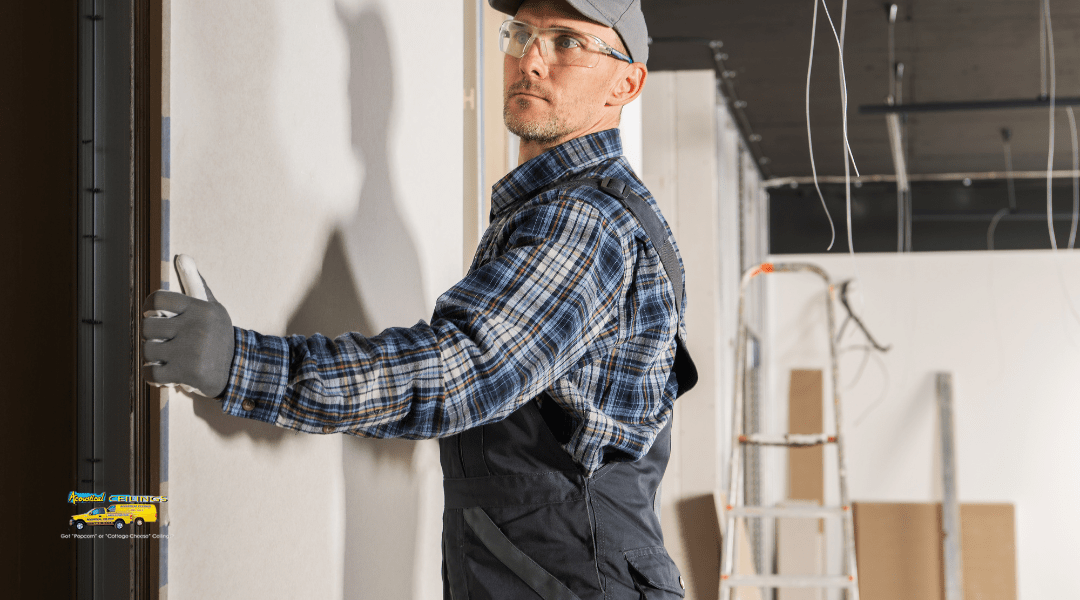
Step 2: Securing Panels to Wall Studs
Start hanging drywall from the top corner of your wall, working your way down. It’s best to attach the panels vertically. Lift a panel into place against the wall studs and check that it’s level. Use a drywall lift if available.
Once positioned, secure the panel to the studs using drywall screws. Use a power drill to drive screws into the panel about 12 inches apart. The screws should be slightly recessed into the drywall surface without breaking the paper.
Remember to leave a small gap at the bottom for expansion and contraction. Repeat this process for the remaining panels, ensuring they fit snugly together.
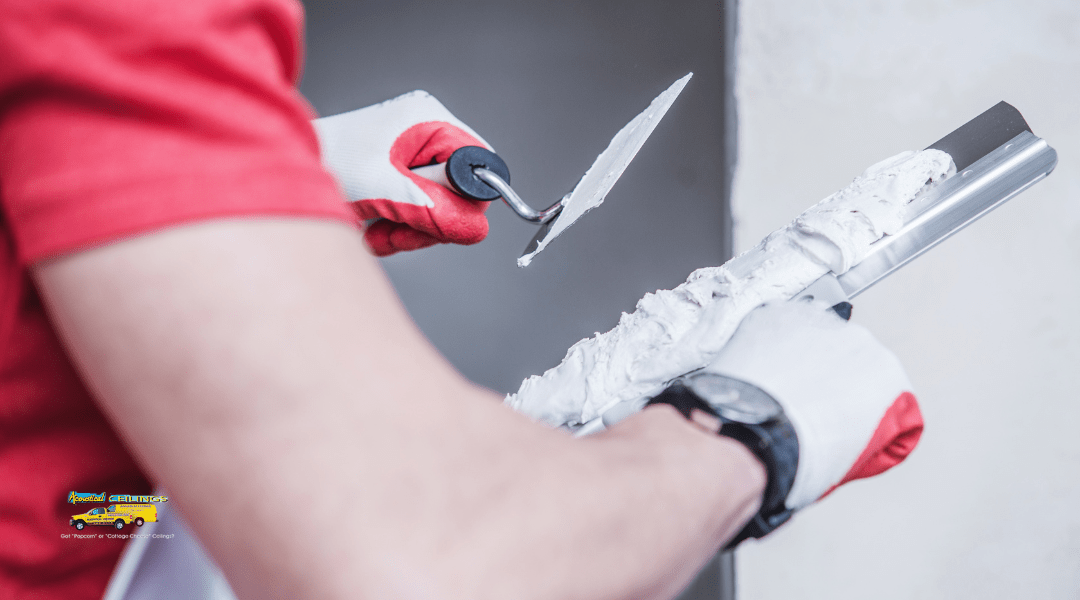
Step 3: Taping and Applying Joint Compound
After all panels are in place, it’s time to tape the seams. Use a drywall tape, either paper or fiberglass mesh. Lay the tape over each seam, pressing it down firmly.
Next, apply joint compound over the tape using a putty knife. Start with a thin layer, spreading it evenly over the seams. Feather the edges to blend it into the drywall surface.
Let the compound dry for at least 24 hours. You may need to apply a second and third coat for a smoother finish. Each coat should be wider than the last to ensure a seamless transition.
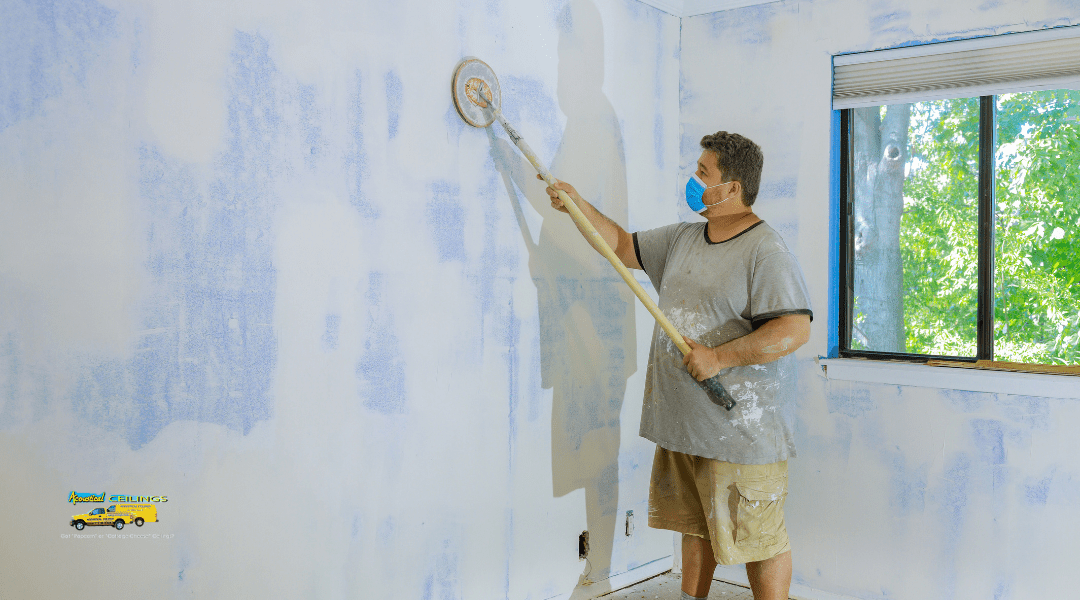
Step 4: Sanding and Smoothing the Finish
Once the joint compound is completely dry, it’s time to sand the surface. Use a sanding block or a pole sander with fine-grit sandpaper to smooth out any rough spots.
Make sure to sand lightly to avoid damaging the drywall beneath the compound. After sanding, wipe the surface with a damp cloth to remove dust particles.
This step is crucial for achieving a professional look before painting. Take your time to ensure that every area is smooth and even.
Step 5: Final Touches Before Painting
The final step involves checking your work. Inspect the seams and edges for any imperfections. If needed, apply a final layer of joint compound, sand again, and wipe clean.
Once satisfied with the finish, it’s time to prime the drywall. Use a primer suited for new drywall to ensure a good paint finish. Applying primer will also help seal the surface, making your paint job look great.
Now your drywall is ready for painting. Ensure everything is dry and clean before you start.
Installing Drywall on Ceilings and Acoustical Panels
When installing drywall on ceilings, it’s important to follow specific techniques for a smooth finish. You will also want to understand the differences between standard drywall and acoustical panels to ensure you choose the right materials for your needs. Finally, special attention is needed when working around light fixtures and vents.
Drywalling Standard Ceilings
To start drywalling your ceiling, begin at one corner. Place the board tight against the wall and secure it to the ceiling joists with screws. Use at least five screws for the center and more at the edges. Properly spacing these screws is vital for stability.
Make sure to stagger the joints of the drywall sheets. This technique prevents cracks and improves durability. When finishing, use a joint compound to fill in seams and cover screws. Sand the surface once it’s dry for a smooth finish.
If you’re working alone, consider renting a drywall lift. This tool makes it easier to position the heavy boards overhead without straining yourself.
Drywall vs Acoustical Ceilings: What’s the Difference?
Standard drywall is typically used for general ceiling installation, but acoustical panels are specifically designed to absorb sound. If noise control is your goal, consider using acoustical panels.
Acoustical panels come in various materials and thicknesses, affecting their sound absorption capabilities. These panels often require a different installation technique, as they need a suspension grid for support.
Installing acoustical panels involves hanging them on the grid system rather than directly to the joists. This allows for better soundproofing and can improve the overall ambiance of the room.
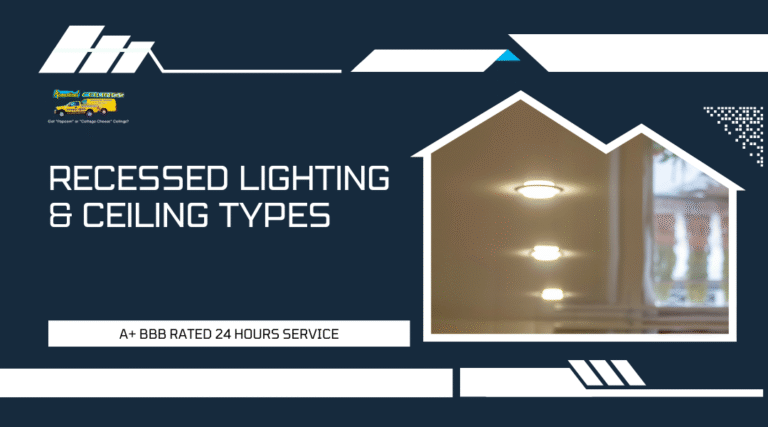
Tips for Installing Around Light Fixtures and Vents
When installing drywall around light fixtures and vents, precise measurements are key. Start by measuring the light fixture’s dimensions and marking the cutout location on the drywall sheet.
For vents, ensure that you account for the duct’s depth. Use a drywall saw to carefully cut out the shapes.
Seal any gaps around light fixtures and vents with caulking or foam insulation. This step prevents air leaks and improves energy efficiency. Always turn off power to light fixtures before beginning any work to ensure safety.
Working with a Drywall Contractor in Rancho Cucamonga
When you need drywall installation, it’s crucial to know when to hire a professional, what to expect during the process, and how to find the right local expert. This knowledge will help you make informed decisions for your project.
When It’s Best to Hire a Pro
Hiring a drywall contractor is often the best choice for larger projects or complex installations. If you are adding new walls, finishing a basement, or repairing water damage, professional help ensures a high-quality finish.
Consider hiring a pro if you lack the necessary tools or experience. For example, drywall work often requires specialized tools like a drywall lift or a mud mixer.
A professional can also save you time, allowing you to focus on your daily activities. Plus, their expertise ensures that the job meets local building codes and regulations.
What to Expect During Professional Installation
During installation, prepare for several key steps. First, the contractor will assess the area, measure spaces, and gather materials. This step is essential to ensure all dimensions are correct.
Next, the team will install the drywall, which usually involves hanging the boards, taping seams, and applying joint compound. They will ensure everything is smooth and level.
After the drywall is up, expect sanding and finishing work. This process can create dust, so be prepared for some cleanup afterward. A professional will keep this as minimal as possible.
Finding the Right Local Drywall Expert
To find a suitable drywall contractor, start by researching local options. Use reviews and ratings to gauge their reliability. Websites like Yelp can provide insights from other homeowners.
Check for licenses and insurance to ensure you’re working with a qualified professional. This step protects you from potential liabilities during the project.
Once you have a few candidates, ask for detailed quotes. Comparing prices and services can help you determine which contractor is the best fit for your needs. Make sure to discuss timelines and any warranty on their work for added reassurance.
Expert Tips for a Professional Finish
Achieving a professional finish when installing drywall is essential for a polished look. With careful attention to detail, you can avoid common pitfalls, ensure a seamless surface, and prepare effectively for painting or texturing.
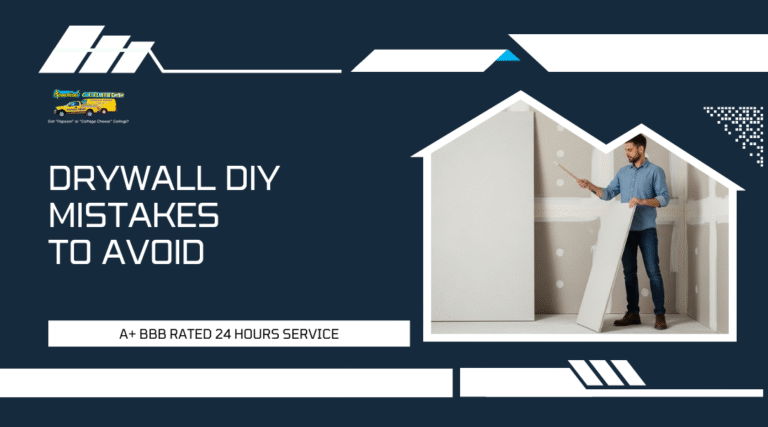
Avoiding Common Drywall Mistakes
The first step to a successful drywall installation is to avoid some typical errors. Here are key mistakes to watch out for:
- Incorrect Measurements: Always double-check measurements before cutting. A wrong cut can lead to gaps and complicated repairs.
- Fastener Placement: Use screws at the right intervals. 16 inches apart is standard. Improper placement can cause the drywall to bow or crack.
- Insufficient Taping: Don’t skimp on joint tape. It should cover all seams entirely. Poor taping can lead to visible seams after finishing.
- Rushing the Mud Application: Apply joint compound in thin layers. Thick applications can dry unevenly and crack.
Taking steps to avoid these common errors will significantly enhance your drywall installation project.
Achieving a Smooth Seamless Look
To create a seamless look, you must focus on your taping and mudding technique. Here’s how to achieve the best results:
- Use a Quality Tape: Choose either paper or mesh tape, but paper tape is often better for achieving a smooth finish.
- Apply Compound Properly: Use a trowel or mud pan to spread joint compound evenly. Aim for a feathered edge to blend into the wall.
- Sand Between Coats: Once the first coat dries, sand lightly to create a smooth surface. This step ensures the final layer adheres well.
- Final Coat Focus: When applying the final coat, use a wide trowel. This spreads the compound further, minimizing visible seams.
Following these steps will help you achieve a polished wall that looks professionally done.
Prepping for Paint or Wall Textures
Before you start painting or adding textures, proper preparation is key. Consider these essential steps:
- Clean the Surface: Wipe down the drywall to remove dust particles. A clean surface ensures better adhesion of paint or texture.
- Prime the Wall: Always use a quality primer before painting. This seals the drywall and provides a uniform base color.
- Choose the Right Finish: Select a paint finish that suits the room. Satin or eggshell works well for most areas due to their durability.
- Test Texture Samples: If you plan to add a texture, test samples on a scrap piece of drywall. This helps you visualize how it will look.
By meticulously preparing your drywall, you create a solid foundation for whatever finish you choose.
Key Drywall Installation Statistics
Understanding the costs and popular choices in drywall installation is essential for any homeowner. You can make informed decisions based on these statistics.
Average Costs for DIY vs Contractor Services
If you decide to tackle drywall installation yourself, the average cost for materials ranges between $0.30 to $0.80 per square foot. This includes drywall sheets, tape, and joint compounds. You’ll also need tools like a drywall saw, taping knife, and joint knife, which might add another $100 to $200 to your initial investment.
Hiring a professional contractor can increase your expenses significantly. Average rates are typically around $1.50 to $3.50 per square foot, including labor and materials. For a 1,500-square-foot home, you might pay between $2,250 to $5,250. These costs can vary based on your location and the complexity of the job.
Most Popular Wall Finishes in California Homes
California homeowners often prefer specific wall finishes that enhance aesthetic appeal and functionality. The most common finishes include:
- Flat Finish: This is often chosen for its budget-friendly nature. It hides imperfections well but is harder to clean.
- Satin Finish: This option adds a slight sheen. It’s more durable, making it easier to wash, and is suitable for high-traffic areas.
- Textured Finish: Unique styles like knockdown and skip trowel add personality to walls but may require more skill to achieve.
Each finish contributes to the overall look of your home. Consider what matches your style and maintenance preferences when selecting a finish.
Real-Life Homeowner Success Stories
Hearing about real experiences can guide you through your own drywall project. Homeowners in Rancho Cucamonga have transformed their spaces, showcasing impressive before and after results that highlight the impact of quality drywall installation.
Transformations Before and After Installation
Many homeowners start with outdated or damaged drywall. For example, a family in Rancho Cucamonga faced peeling paint and cracks on their living room walls. After hiring professionals to replace the drywall, they enjoyed a fresh, smooth finish that brightened their entire space.
The difference was instantly noticeable. The new drywall improved insulation, making the room more comfortable. Homeowners reported a dramatic change in both aesthetics and energy efficiency. They often share images showing their previous issues alongside stunning after photos. A simple remodeling project can lead to a remarkable transformation.
Rancho Cucamonga Projects That Inspire
In Rancho Cucamonga, several projects highlight successful drywall installations. One notable example involved a kitchen remodel. A couple removed old, unsightly panels and opted for modern drywall that complemented their new cabinets and countertops.
This change allowed for better lighting and a more open feel. The homeowners received compliments from friends and family who were impressed by their stylish update. Projects like this demonstrate how proper drywall installation can enhance both the beauty and functionality of a home. Many homeowners love sharing their stories, inspiring others to tackle their own remodeling projects.