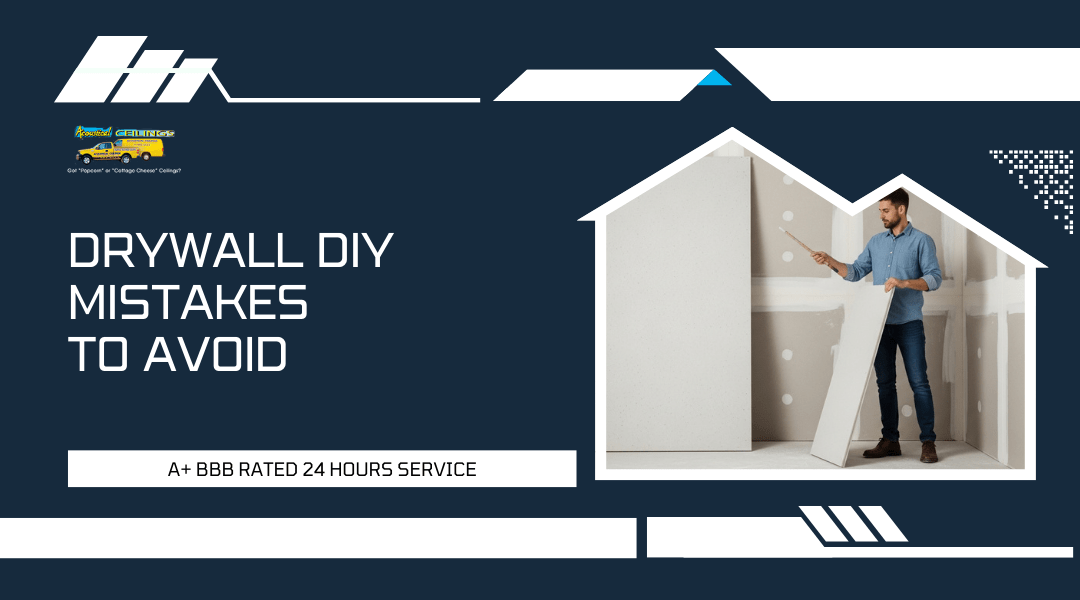
Tackling drywall work on your own can seem straightforward, but it often turns out more complicated than expected. Small errors in measuring, cutting, or finishing can quickly lead to uneven surfaces, visible seams, or even structural issues. Avoiding the most common drywall DIY mistakes saves you time, money, and frustration while protecting the quality of your home.
What makes drywall tricky is that the problems don’t always show up right away. A poorly taped joint, a rushed sanding job, or ignoring moisture risks can all look fine at first but cause cracking, bubbling, or mold later. That’s why knowing what to watch out for before starting a project is essential.
At Acoustical Ceilings in Rancho Cucamonga, you gain the advantage of decades of experience in drywall installation, repair, and restoration. Whether you’re curious about why drywall projects often appear easier than they are or want to know which mistakes to avoid, this guide will walk you through the key details that make the difference between a smooth finish and a costly redo.
Why Drywall Projects Seem Easier Than They Really Are
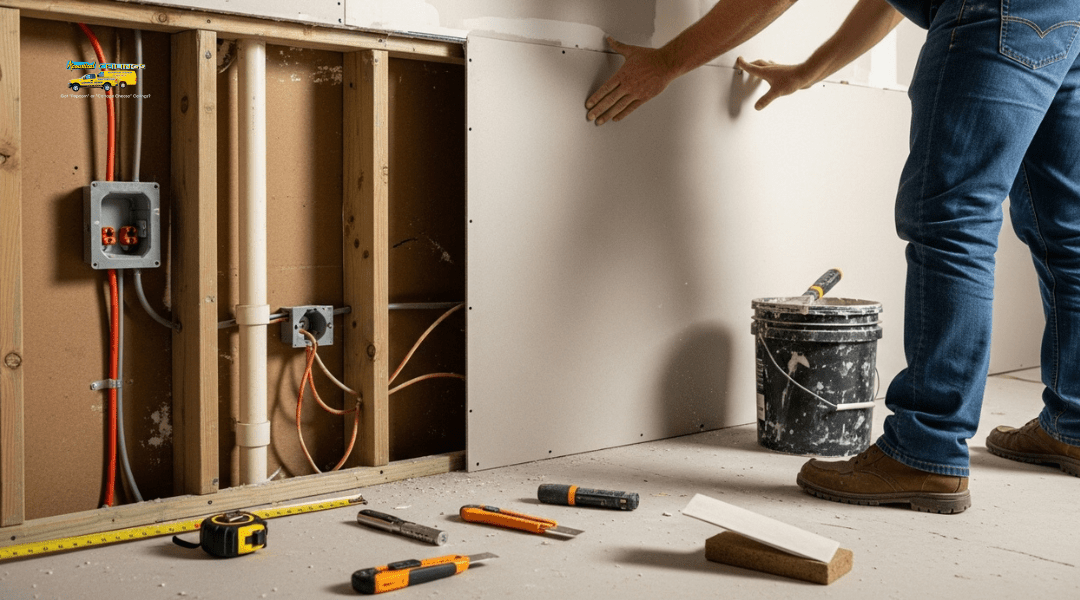
Drywall often looks like a straightforward task—measure, cut, hang, and finish. But the process involves technical skills, specialized tools, and attention to detail that can make the difference between a smooth wall and one that shows every flaw.
The Appeal of Saving Money with DIY
Many homeowners take on drywall projects to avoid labor costs. On the surface, the job seems like it only requires basic tools such as a utility knife, screws, and joint compound. The idea of handling it yourself can feel like a simple way to stretch your renovation budget.
However, the savings are not always as clear as they seem. You may need additional equipment like a drywall lift, sanding tools, or taping knives in multiple sizes. These costs add up quickly, especially if you only plan to use the tools once.
Another factor is the cost of mistakes. Uneven cuts, poor taping, or improper mudding can leave visible seams and bumps. Fixing these issues often requires more materials and sometimes professional rework, which eliminates the original savings.
When you compare the upfront expenses of DIY with the potential hidden costs, the financial benefit becomes less certain. What looks like a low-cost project can easily exceed the price of hiring an experienced contractor.
Hidden Complexities That Catch Homeowners Off Guard
Drywall installation involves more than just attaching panels to wall studs. Proper planning is needed to account for electrical boxes, plumbing, and ceiling alignment. Even small miscalculations can create gaps or uneven surfaces that are difficult to correct later.
Finishing work is another area that surprises homeowners. Applying joint compound requires multiple coats, each sanded smooth before the next application. If you rush this process, you end up with ridges, visible seams, or dust spread throughout your home.
Moisture control and ventilation also play a role. Installing drywall in areas like bathrooms or basements requires moisture-resistant boards and proper sealing. Overlooking this detail can lead to mold growth or early deterioration of the wall surface.
The time commitment is often underestimated as well. What may seem like a weekend project can stretch into several weeks once drying times, sanding, and corrections are factored in. This delay can disrupt your household and add frustration to the process.
Common Drywall DIY Mistakes to Watch Out For
Small errors during drywall work can lead to uneven walls, visible seams, or long-term structural problems. Paying attention to material choice, fastening methods, and finishing steps helps you avoid issues that often require costly repairs later.
Using the Wrong Type or Thickness of Drywall
Choosing drywall without considering the room’s purpose often creates problems. For example, using standard drywall in a bathroom or basement exposes it to moisture damage. In these areas, moisture-resistant or mold-resistant boards are the better choice.
Thickness also matters. 1/2-inch drywall is common for interior walls, while 5/8-inch drywall provides better fire resistance and soundproofing. Ceilings often require thicker panels to prevent sagging.
Using the wrong type or thickness can result in cracks, warping, or premature replacement. Always match the drywall to the environment and structural needs of the space.
Poor Measuring and Cutting Techniques
Inaccurate measurements lead to gaps, uneven seams, and wasted material. You should always measure twice before cutting to ensure panels fit tightly against studs and other surfaces.
Cutting drywall with dull blades or rushing through the process causes rough edges. These uneven cuts make seams harder to tape and finish. A sharp utility knife and a straightedge help you achieve clean, precise cuts.
Even small mistakes in measuring and cutting compound later during finishing. Careful preparation saves time and reduces the need for excessive joint compound or sanding.
Over-Screwing or Under-Securing Panels
Fastening drywall incorrectly weakens the installation. Driving screws too deep breaks the paper surface, reducing the panel’s holding strength. This often leads to loose panels or visible screw pops after painting.
On the other hand, using too few screws leaves the drywall unstable. Panels may shift, creating cracks along seams. A good rule is to place screws every 12 to 16 inches on studs and ensure they sit slightly below the surface without tearing the paper.
Balanced fastening keeps the drywall secure and prevents long-term movement or surface flaws.
Skipping Proper Joint Taping and Finishing
Leaving out drywall tape at seams leads to visible cracks once the wall settles. The tape reinforces the joint and helps the joint compound bond across panels. Without it, even small shifts in the framing cause seams to split.
You should apply tape directly over the first coat of compound and smooth it firmly. Paper tape works well for flat seams, while mesh tape can be useful for repairs or butt joints.
Proper taping ensures a seamless surface and reduces the chance of repairs later. Skipping this step almost always results in visible flaws.
Applying Too Much or Too Little Joint Compound
Joint compound plays a key role in hiding seams and fasteners. Applying too much creates thick ridges that require extra sanding. Heavy layers also increase drying time and may crack as they shrink.
Applying too little leaves seams visible and does not fully embed the tape. This weakens the finish and makes paint or texture look uneven.
The best approach is to apply several thin layers, feathering each coat wider than the last. This method produces a smooth, professional finish without excess sanding.
Neglecting Sanding for a Smooth Finish
Skipping sanding or rushing through it leaves ridges, bumps, and visible seams. These imperfections become more noticeable once the wall is painted.

You should sand between coats of joint compound with fine-grit sandpaper or a sanding sponge. Light pressure prevents gouging the surface. A pole sander helps cover larger areas evenly.
Dust control is also important. Using a vacuum attachment or damp sponge reduces airborne dust and leaves a cleaner surface for priming and painting.
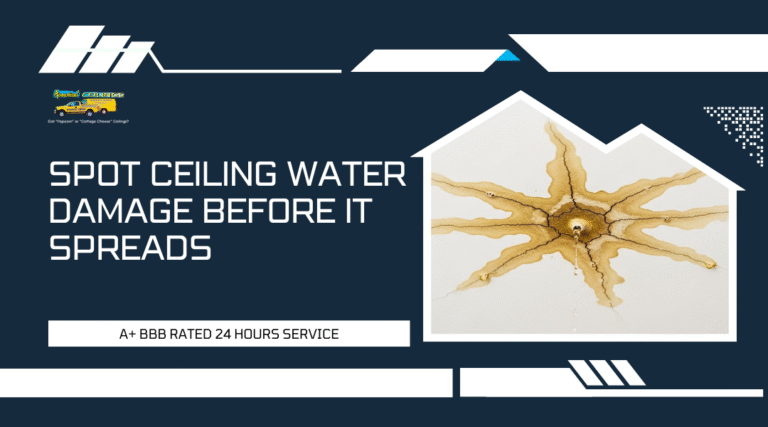
Ignoring Moisture or Water Damage Issues Before Installation
Installing drywall over damp framing, leaks, or poor ventilation creates long-term problems. Moisture trapped behind drywall encourages mold growth and weakens the panels.
You should always inspect for plumbing leaks, roof issues, or basement humidity before starting. Using a moisture meter can confirm that the framing is dry enough for installation.
In areas with higher moisture risk, select green board or cement board instead of standard drywall. Addressing water issues first prevents costly repairs and protects the durability of your walls.
The Impact of These Mistakes on Your Home
When drywall installation goes wrong, the problems extend beyond appearance. Poor workmanship can affect the strength of your walls, create long-term maintenance issues, and even lead to health concerns inside your home.
Uneven Walls and Visible Seams
If you fail to align drywall panels properly or apply joint compound inconsistently, the result is uneven surfaces. Light shining across the wall will highlight every ridge, dip, or seam, making the finish look unprofessional.
Visible seams also limit your options for paint and texture. Smooth finishes, in particular, reveal imperfections more clearly. Even wallpaper may not conceal the unevenness, leaving you with a surface that always looks unfinished.
Correcting these issues often requires sanding, re-taping, or even replacing sections of drywall. This adds unnecessary time and cost compared to getting it right the first time.
Cracks and Structural Weak Points Over Time
Improper fastening, poor taping, or skipping screws in key areas can create weak points in your walls. Over time, these areas are more likely to crack as the house settles or as temperature and humidity shift.
Cracks do more than hurt your home’s appearance. They can allow moisture and pests to enter, and in some cases, they compromise the wall’s ability to support fixtures or shelves.
You may also see recurring cracks if the original installation was not reinforced correctly. This means patching them won’t solve the root problem, and you’ll continue to deal with the same repair.
Mold Growth and Indoor Air Quality Concerns
When drywall is not sealed or finished properly, moisture can seep in through gaps or poorly taped seams. Bathrooms, kitchens, and basements are especially vulnerable. Once moisture gets behind the surface, mold growth becomes a serious risk.
Mold not only damages the drywall itself but also affects indoor air quality. Prolonged exposure can trigger allergies or respiratory issues. In many cases, you won’t notice the problem until stains or odors appear, by which point the damage is already advanced.
Preventing mold requires careful installation, correct sealing, and proper ventilation. Cutting corners during drywall work leaves your home more susceptible to hidden water damage and costly remediation.
Higher Repair Costs Down the Road
Mistakes in drywall installation often seem minor at first, but they lead to more expensive fixes later. Uneven walls need resurfacing, cracks require reinforcement, and mold damage may require full panel replacement.
Hiring a professional after a failed DIY project often costs more than if you had done it right from the start. You pay for both the initial materials and the corrective labor.
In addition, repeated repairs can lower the value of your home during resale. Buyers notice patched walls, visible seams, and water stains, which can raise questions about the quality of the entire property.
When It Makes Sense to Hire a Professional
Some drywall projects require specialized tools, precise techniques, and experience that go beyond what most homeowners can handle. In these cases, hiring a professional saves you time, prevents costly errors, and ensures a durable, clean finish.
Large-Scale Installations or Remodels
When you take on a full-room installation or a home remodel, the scale of the work can quickly become overwhelming. Installing multiple sheets of drywall requires more than just lifting and fastening. You need to plan seams, stagger joints, and align panels correctly to avoid cracks and uneven surfaces later.
Professional contractors bring teams and equipment that allow them to handle heavy sheets safely and efficiently. They also know how to manage large spaces so that seams are minimized and walls remain structurally sound.
If you attempt this type of project on your own, you may face issues like misaligned joints, uneven walls, or gaps that are difficult to patch. These mistakes are not only visible but can also affect paint and finishing work. Hiring a drywall company ensures the project is completed to code and within a reasonable timeframe.
Ceilings, Corners, and Complex Architectural Features
Working on ceilings and tight corners requires precision and stamina. Ceiling drywall sheets are heavy, and installing them overhead without the right lifts or supports is difficult and unsafe. Even if you manage to get them in place, taping and finishing seams above your head is one of the hardest parts of drywall work.
Corners and unusual angles also present challenges. Achieving clean lines in areas like vaulted ceilings, alcoves, or curved walls takes skill and the right tools. Professionals use corner beads, specialty fasteners, and finishing techniques that ensure these areas look seamless.
If you try to do this on your own, you may end up with uneven corners, sagging panels, or visible seams that stand out once painted. A professional ensures these details are handled correctly, giving your space a polished and uniform look.
Repairs After Water or Structural Damage
Drywall that has been damaged by water, mold, or structural shifts requires more than just patching. You need to identify and address the underlying cause before replacing the drywall, whether it’s a roof leak, plumbing issue, or foundation movement.
Professionals know how to assess the extent of the damage and determine whether sections of framing or insulation also need replacement. They use moisture meters, mold-resistant materials, and proper sealing methods to prevent future problems.
If you only replace the visible drywall without correcting the source of the issue, the problem will return. Hiring a contractor ensures the repair is thorough and long-lasting, protecting your home from repeated damage and unnecessary costs.
Why Homeowners in Rancho Cucamonga Trust Acoustical Ceilings
When you need drywall work done in your home, you want a contractor who brings skill, consistency, and a proven record of results. You also want the peace of mind that comes from hiring a local team familiar with the unique needs of homes in Rancho Cucamonga.
Decades of Expertise in Drywall Installation and Repair
With years of hands-on experience, Acoustical Ceilings has worked on everything from small drywall repair jobs to full ceiling installations. This history means you benefit from techniques refined over time and solutions tailored to both modern builds and older homes.
You avoid the common mistakes that less experienced contractors make, such as misaligned seams or uneven finishes. The team knows how to handle tricky areas like inside corners, ceiling joints, and cutouts for outlets without leaving gaps or rough edges.
Because drywall projects often involve multiple steps—hanging, taping, mudding, sanding, and priming—you gain the advantage of a contractor who understands how each stage affects the final look. This reduces the risk of rework and ensures your walls and ceilings are ready for paint or texture.
Precision Tools and Techniques That Ensure Flawless Results
The right tools make a noticeable difference in drywall quality. Acoustical Ceilings uses professional-grade lifts, sanders, and mixing equipment to achieve smooth, consistent finishes. This is especially important for ceilings, where panels must be aligned correctly to prevent sagging or visible seams.
You also benefit from proven techniques such as applying multiple thin coats of joint compound rather than one thick layer. This approach minimizes cracking and reduces sanding time, leaving surfaces even and ready for primer.
Attention to detail extends to drywall repair work as well. Whether patching a small hole or replacing larger sections, the team ensures the repaired area blends seamlessly with the surrounding wall. That means you don’t see obvious patches once the paint goes on.
Local Reputation for Quality and Customer Satisfaction
In Rancho Cucamonga, word of mouth carries weight. Acoustical Ceilings has built a reputation by consistently delivering drywall projects that meet both functional and aesthetic expectations. Homeowners know they can rely on clear communication, accurate timelines, and respect for their living space.
Clients often return for additional work because they appreciate the combination of technical skill and professionalism. From repairing water-damaged drywall to finishing new additions, the company has earned trust through consistent results.
By focusing on quality workmanship and dependable service, Acoustical Ceilings has become a preferred choice for homeowners who want drywall projects completed correctly the first time.