Drywall problems can be frustrating, but knowing how to address them makes all the difference. Common issues you might encounter include cracks, water damage, and dents. Understanding how to identify and fix these problems helps maintain the beauty and integrity of your walls and ceilings.
At Acoustical Ceilings, we specialize in drywall installation and repair in Rancho Cucamonga, California. Our expertise ensures that even the most challenging drywall problems can be tackled effectively. From minor repairs to complete replacements, we provide solutions that restore both functionality and aesthetics.
When faced with drywall issues, acting quickly is essential to prevent further damage. Whether you are dealing with stubborn water stains or unsightly cracks, knowing the right steps to take can save you time and money. This article will guide you through the most common drywall problems and offer practical solutions to help you achieve a polished and durable finish in your space.
Identifying Common Drywall Problems
When it comes to drywall, several issues can arise over time. Being able to identify these problems will help you decide on the necessary repairs. Here are some common drywall problems to look for.
Cracks and Hairline Fissures
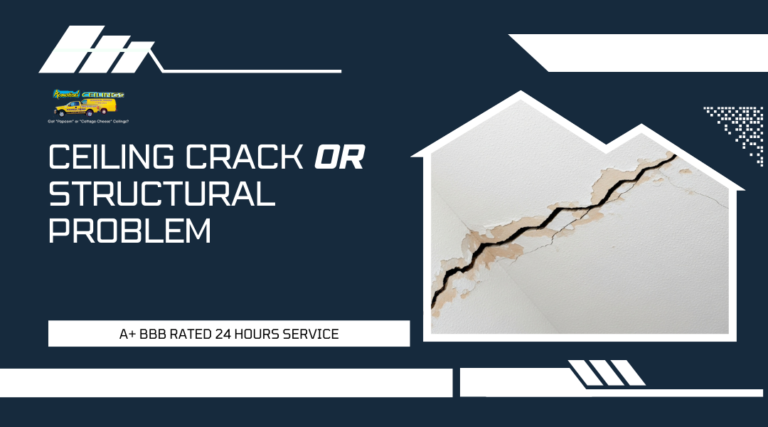
Cracks can appear in different forms. Hairline fissures are often caused by minor settling in your home or temperature changes. These cracks may not be serious but could worsen if left untreated.
Wider cracks usually indicate more significant problems, such as foundation issues. It’s important to monitor these cracks regularly. If you notice them growing, consulting a professional may be a good idea.
In many cases, repairing cracks involves filling them with spackle, then sanding and repainting for a smooth finish. This will protect your wall and improve its appearance.
Water Damage and Stains
Water damage is a critical issue that can lead to serious problems, including mold. Look for discoloration or stains on your drywall, indicating previous leaks or moisture issues.
This damage often occurs in areas near plumbing fixtures, ceilings, or external walls. You must fix the source of the water before repairing the drywall.
To repair water damage, remove the affected sections and replace them with new drywall. Ensure the area is fully dry, and consider using a moisture barrier.
Holes and Dents
Holes and dents can happen for many reasons, from moving furniture to accidental impacts. Even small holes need attention, as they can affect the wall’s integrity over time.
To repair a hole, first clean around it. Then, use a drywall repair patch for larger holes or spackle for smaller ones. After the patch dries, sand it smooth and paint to match the surrounding area.
Using a light hand while moving objects can help reduce future damage.
Bubbling and Peeling Paint
Bubbling or peeling paint often signals underlying problems. This issue can arise from moisture trapped underneath the paint or low-quality materials used.
You can typically fix this by scraping away the peeling areas and reapplying paint. Ensuring the surface is dry and clean before repainting is essential.
If bubbling keeps returning, you may need to investigate for moisture issues. Addressing those will be important to maintain the paint’s lifespan.
Nail Pops and Fastener Issues
Nail pops occur when fasteners back out of the drywall. This issue is common due to changes in humidity and temperature. You may notice small dimples or bumps where nails or screws have pushed through the surface.
To repair nail pops, press the fastener back in, then cover it with spackle. Sand and repaint for a clean finish.
Regular inspections can help you catch this problem early, preventing further damage to your walls.
Mold and Mildew Growth
Mold and mildew can flourish in damp areas, making them serious health concerns. Look for discoloration or a musty smell, particularly in bathrooms and basements.
If you find mold, it is crucial to address the source of moisture first. Once that’s fixed, remove the affected drywall sections and replace them.
Using mold-resistant paint can help prevent future growth. Regularly checking high-moisture areas will keep your home safer and healthier.
Causes Behind Drywall Issues
Understanding the reasons behind drywall problems is essential for effective repairs. Common causes include structural movement, moisture exposure, installation flaws, and wear from everyday use. Each factor contributes to various issues you may experience.
Structural Movement and Settling
As your home ages, it may settle due to changes in the foundation. This settling can cause walls to shift, leading to cracks in the drywall. Stress from this movement is often evident in hairline cracks that form along seams or corners.
The foundation can shift for several reasons. Soil changes, heavy rain, or tree roots can all affect your home’s stability. Regular inspections can help catch these issues before they lead to significant damage.
Moisture and Humidity Exposure
Drywall is sensitive to moisture. High humidity levels or water leaks can cause drywall to weaken and sag. If left unaddressed, this can lead to mold growth, which poses health risks.
In bathrooms or kitchens, it’s crucial to use moisture-resistant drywall. Using dehumidifiers can also help maintain lower humidity levels in your home. Regularly check for leaks in plumbing or roofs to prevent moisture-related issues.
Poor Installation or Low-Quality Materials
Using low-quality drywall or improper installation techniques can lead to problems down the line. If drywall is not installed correctly, it can crack or warp more easily. Poor taping or mudding can also create visible seams or bulges.
To avoid these issues, always hire an experienced contractor for your installation. Make sure they use good quality materials and follow industry standards. Investing in proper installation can save you time and money in the long run.
Impact and Wear Over Time
Daily activities can take a toll on your drywall. Bumps from furniture, scuffs from shoes, and even kids playing can lead to dents or scratches. Over time, these minor damages can accumulate and require repair.
To protect your drywall, consider adding corner guards in high-traffic areas. Regularly cleaning walls can also help you catch small damages before they worsen. Addressing these issues quickly will help maintain the appearance of your walls.
How to Fix Cracks and Hairline Fissures
Fixing cracks and hairline fissures in drywall is an essential skill for homeowners. Addressing these issues promptly not only improves appearance but also prevents further damage. Follow these steps for a thorough repair.
Preparing the Surface for Repair
Before you start, prepare the area to ensure a successful fix. First, clean the crack thoroughly to remove dust and debris. Use a utility knife to widen the crack slightly, creating a V-shaped groove. This allows the repair material to adhere better.
Next, check for underlying issues like moisture or structural damage. If you find any, fix those problems before proceeding. Make sure the surface is dry before you apply any materials. It’s essential to create a stable foundation for your repair.
Applying Joint Compound and Tape
After preparation, gather your materials. You will need joint compound, drywall tape, and a putty knife. Apply a thin layer of joint compound over the crack using the putty knife. Press the drywall tape into the compound while it’s still wet. This helps reinforce the repair and prevents cracks from reappearing.
Once the tape is in place, cover it with another layer of joint compound. Feather the edges for a smooth transition to the surrounding drywall. Allow this layer to dry completely, which usually takes a few hours. You may need to apply additional coats for thick cracks.
Sanding and Painting for a Smooth Finish
Once the joint compound is fully dry, it’s time to sand. Use a fine-grit sandpaper to gently smooth the area. This step is crucial for achieving a seamless finish. Be careful not to sand too aggressively, as this can damage the surrounding drywall.
After sanding, wipe away any dust. Now, you’re ready to paint. Choose a paint that matches your wall color. Apply a primer if necessary, especially if the compound is thick. Then, paint the area with your chosen color to blend it in with the rest of the wall. Make sure to let the paint dry completely before inspecting the final result.
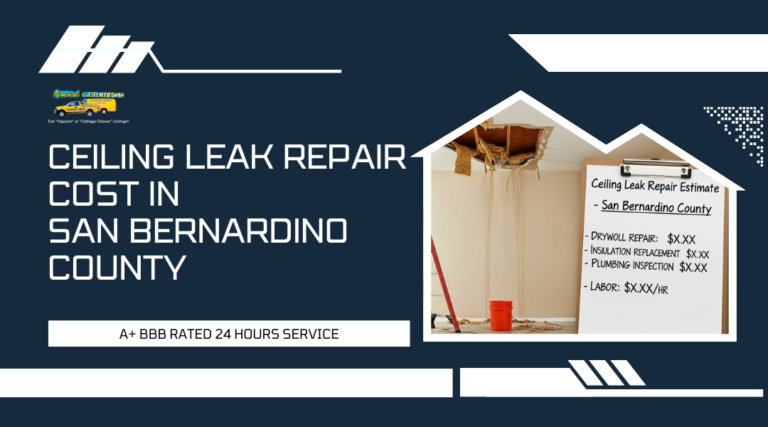
Repairing Water Damage and Stains
Water damage can lead to serious issues with your drywall. Addressing it promptly and properly is crucial. You need to identify the source of moisture, remove any damaged sections, and treat the area before making any replacements.
Identifying the Source of Moisture
First, pinpoint where the moisture is coming from. Common sources include leaky roofs, broken pipes, or high humidity. Look for water stains on walls and ceilings, which often indicate water intrusion.
Use a moisture meter to check areas behind the wall. If you find persistent moisture, make repairs. This could involve fixing plumbing leaks or improving ventilation. Ignoring the source will just lead to further damage.
Removing Damaged Drywall Sections
Once you have stopped the moisture, it’s time to remove the damaged drywall. Cut out sections that are wet or moldy. Make sure to wear gloves and a mask to protect yourself from mold spores.
Use a drywall saw to carefully cut the drywall. Be careful not to damage the framing behind it. Dispose of all damaged materials properly to prevent mold spread.
Make sure to check adjacent areas for hidden damage. If you see signs of moisture in those areas, you may need to remove more drywall.
Treating and Sealing the Area Before Replacement
Before replacing drywall, treat the area to prevent future damage. Use a mold-resistant sealant on exposed studs and existing walls. This extra layer will help protect against moisture.
After sealing, allow the treatment to dry completely before installing new drywall. Choose mold-resistant drywall for better protection against future moisture issues.
Make sure to apply a coat of primer before painting. This will help create a strong barrier against water and stains. Regular inspections can help catch potential problems early.
Patching Holes and Dents
Repairing drywall holes and dents can seem daunting, but with the right approach, it can be a simple task. You can effectively fix small and large holes to restore your walls. This guide will cover essential techniques for patching these problems.
Small Hole Repairs with Spackle or Patch Kits
For smaller holes, such as those from nails or screws, using spackle or a patch kit works well. First, clean the area around the hole to remove any loose debris.
Apply spackle directly into the hole using a putty knife. Make sure to fill it completely and smooth the surface.
After the spackle dries, you can lightly sand the area for a smooth finish. If you used a patch kit, follow the instructions closely. This typically involves applying adhesive and then a patch over the hole before spackling.
Once everything is dry and smooth, it’s ready for painting to match your walls.
Large Hole Repairs: Cutting and Replacing Drywall Panels
For larger holes, more extensive repair is necessary. Start by measuring the hole and cutting a piece of drywall that’s slightly larger than the damaged area. Use a drywall saw for clean edges.
After cutting the new piece, trace around the hole on the wall, and cut along these marked lines. Then, place the new drywall in the hole.
Secure it with drywall screws. You may need to add wood backing for better support if the hole is extensive.
After installation, apply joint compound over the seams to blend it into the wall. Once dry, it should be sanded and smoothed in preparation for painting.
Finishing Touches: Sanding and Painting
Once repairs are made, finishing touches are crucial for a seamless appearance. Begin by sanding the patched areas with fine-grit sandpaper to ensure they are level with the surrounding wall.
Cleaning up dust is important before painting. Use a damp cloth to wipe down the area.
After that, prime the patched areas if necessary, especially if you used a patch kit. When the primer dries, apply your chosen paint to match the rest of the wall.
This will help you achieve a uniform look and make the repairs nearly invisible.
Addressing Bubbling and Peeling Paint
Bubbling and peeling paint can ruin the appearance of your drywall. Understanding the causes and knowing how to prepare surfaces properly will help you achieve a longer-lasting finish.
Causes Related to Moisture and Poor Adhesion
Moisture is a primary cause of bubbling and peeling paint. When water infiltrates your walls, it creates an environment where paint cannot bond effectively. Inspect areas near plumbing, windows, or roofs for signs of leaks.
Variables like humidity levels can also contribute. High humidity can cause paint to absorb moisture, leading to bubbles.
Poor adhesion might occur due to inadequate surface preparation. If the drywall was not primed correctly or if old paint wasn’t removed, the new layer may not stick.
Take a close look at your paint’s condition. Identify areas that are losing adhesion for targeted repairs. Addressing these problems early saves you time and effort later.
Proper Surface Preparation and Repainting Techniques
Proper surface preparation is key to preventing paint issues. Start by scraping off any peeling or bubbling paint with a putty knife.
Next, sand the surface to ensure it is smooth and free of debris. This step helps the new paint adhere better. After sanding, clean the area with a damp cloth to remove dust.
Using a stain-blocking primer can significantly enhance adhesion. Apply two coats of a primer suited for your surface.
When repainting, choose high-quality paint that is resistant to moisture. This kind of coating is essential in areas prone to humidity, like kitchens and bathrooms.
Apply the paint in thin, even coats. This method avoids drips and allows for better drying, reducing the chance of peeling. Following these techniques leads to a more durable and attractive finish on your drywall.
Fixing Nail Pops and Fastener Problems
Nail pops and loose screws can be a common issue in drywall. Knowing how to identify and fix these problems can help keep your walls looking good and strong. You’ll need to check for loose fasteners and find ways to reinforce them properly.
Identifying and Removing Loose Nails or Screws
Start by inspecting your walls for any visible nail pops or screws that have come loose. These will often create small bumps on the surface of the drywall. Use a flashlight to help you spot them.
To fix these, you can gently press on the popped area. If it moves, the fastener is loose. Remove the loose nail or screw completely. You may need a pry bar or a hammer. Make sure to fill in any holes with spackling paste once the fastener is out.
For nails, consider replacing them with screws for better grip. Screws hold better in the drywall and help prevent future pops.
Reinforcing with New Fasteners and Covering Imperfections
After removing loose fasteners, it’s time to secure them. Drive a new screw into the stud a few inches above or below the original spot. This will help hold the drywall firmly in place.
Consider applying a bead of construction adhesive along the studs before attaching new screws. This helps to further secure the drywall and reduce the chance of future problems. Once you’ve added the new fasteners, cover any imperfections with spackling compound.
After it dries, sand it smooth and paint over the area to match the rest of the wall. This process not only fixes the pop but also makes your wall look new and clean.
Mold and Mildew Prevention and Remediation
Mold and mildew can cause serious damage to your drywall and affect indoor air quality. Knowing how to prevent mold growth and when to seek professional help is essential. Here’s how to manage these issues effectively.
Identifying Mold-Prone Areas
To prevent mold, first identify areas in your home that are prone to moisture. Common spots include:
- Bathrooms: High humidity makes these areas susceptible.
- Kitchens: Leaks from sinks or dishwashers can create dampness.
- Basements: Often cooler and more humid, making them ideal for growth.
- Attics: Poor ventilation can lead to moisture buildup.
Regularly inspect these spaces for signs of water damage or dark spots. If you notice any musty odors or discoloration, take action immediately to prevent mold growth.
Proper Cleaning and Use of Mold-Resistant Products
Regular cleaning with mold-resistant products can keep your home safe. Use a mixture of water and vinegar or a specialized mold cleaner for surfaces that may be prone to growth.
Consider applying mold-resistant paint to drywall in vulnerable areas. This kind of paint helps to inhibit mold growth.
Additionally, ensure your home’s ventilation is adequate. Use exhaust fans in bathrooms and kitchens. Install a dehumidifier in damp areas like basements or crawl spaces to keep humidity levels low.
When to Call Professionals for Mold Remediation
If you find significant mold growth or if it covers more than 10 square feet, it’s time to call in professionals. Do not attempt to handle large infestations on your own, as they can pose health risks.
Professionals use specialized equipment and testing to assess the extent of the issue. They can ensure safe removal without spreading spores to other areas of your home.
If you experience water damage, address it quickly. Waiting too long can lead to a bigger mold problem that may require extensive remediation.
When to Call Acoustical Ceilings for Professional Drywall Repair
If you’re facing drywall issues, it’s crucial to know when to seek professional help. Certain situations call for expert intervention, especially in ensuring lasting quality and adherence to local building regulations.
Complex or Large-Scale Damage
When dealing with complex or large-scale damage, it’s best to call Acoustical Ceilings. Small issues like minor cracks or nail pops can sometimes be fixed by a DIY approach. However, extensive damage, such as significant water impacts or large holes, requires professional tools and skills.
Signs you should seek help:
- Large, visible cracks that spread.
- Water stains indicating leaks.
- Bulging or sagging walls and ceilings.
These problems often hint at underlying issues needing expert assessment. Tackling them without proper knowledge can lead to further damage and costs.
Ensuring Quality, Durable Repairs
Professional services provide reassurance through quality repairs. Acoustical Ceilings focuses on durability, ensuring your drywall not only looks great but lasts longer. DIY efforts might save money initially, but poor repairs can lead to recurring issues.
What you gain from professional repair:
- Use of high-quality materials.
- Access to modern repair techniques.
- A guarantee of work, focusing on longevity.
By hiring professionals, you minimize future headaches and expenses. Your walls and ceilings deserve the best care.
Expertise in Rancho Cucamonga’s Building Codes and Standards
Navigating building codes can be tricky. In Rancho Cucamonga, adherence to local regulations is essential for safety and legality. Acoustical Ceilings understands these codes deeply, ensuring your repairs meet all standards.
Reasons to trust professional expertise:
- Knowledge of local building requirements.
- Compliance with safety regulations.
- Avoidance of potential fines or legal issues.
By calling Acoustical Ceilings, you ensure that your drywall repair is compliant and safe. This can save you from unnecessary complications down the line.