Nail pops and minor ceiling imperfections are common issues that affect almost every home, especially in areas like Rancho Cucamonga where temperature changes and settling foundations cause drywall to shift over time. These small bumps and cracks appear when nails or screws push through your ceiling surface, creating unsightly marks that stand out under the right lighting. While they might seem like purely cosmetic problems, addressing them promptly prevents further damage and maintains your home’s appearance.
Fixing nail pops requires removing loose material, securing the fastener properly, applying joint compound, sanding the area smooth, and painting to match your existing ceiling. The process is straightforward and can be completed with basic tools you likely already have at home. Most repairs take just a few hours of work, though drying time for compound and paint will extend the overall timeline.
Understanding what causes these imperfections and how to repair them correctly saves you money on professional services while giving you the skills to maintain your ceilings long-term. This guide walks you through identifying different types of ceiling damage, gathering the right materials, completing repairs step by step, and taking preventive measures to reduce future issues.
Understanding Nail Pops and Ceiling Imperfections
Nail pops appear as small bumps or dimples in your ceiling surface, while other imperfections can show up as cracks, dents, or uneven areas. These issues stem from various causes related to your home’s materials and environment.
What Are Nail Pops?
A nail pop is a small bulge or bump that forms on your ceiling when a fastener pushes through the drywall surface. You’ll typically see these as round protrusions, sometimes with a small ring of cracked paint around them.
The fastener that causes the problem is usually a nail or screw that was originally driven through the drywall and into a ceiling joist. Over time, this fastener works its way back out toward the surface. When you run your hand across your ceiling, you can feel these bumps clearly.
Nail pops can also appear as small dimples or depressions instead of bumps. This happens when the nail pulls slightly through the drywall paper without fully breaking through the surface. Both types create visible imperfections that disrupt the smooth appearance of your ceiling.
Types of Ceiling Imperfections
Drywall nail pops are the most common type you’ll encounter. These occur when nails push through the drywall as it dries and shifts. You’ll find them most often near corners and edges.
Joint tape separations happen along seams where two drywall sheets meet. The tape pulls away from the joint as fasteners lose their grip. You might notice peeling or uneven paint in these areas.
Screw pops develop when screws get over-tightened during installation. The surrounding material shifts and creates small bulges. These often appear near light fixtures or electrical outlets.
Cracks can form in your ceiling from settling, temperature changes, or structural movement. Small hairline cracks are usually just cosmetic, while larger cracks may signal bigger problems.
Dents and holes result from impacts or removed fixtures. These range from small dings to larger damaged areas that need patching.
Why Nail Pops Occur
Temperature and humidity changes are the main causes of nail pops in your ceiling. When your home heats up or cools down, the drywall expands and contracts. This movement pushes nails out of their original position.
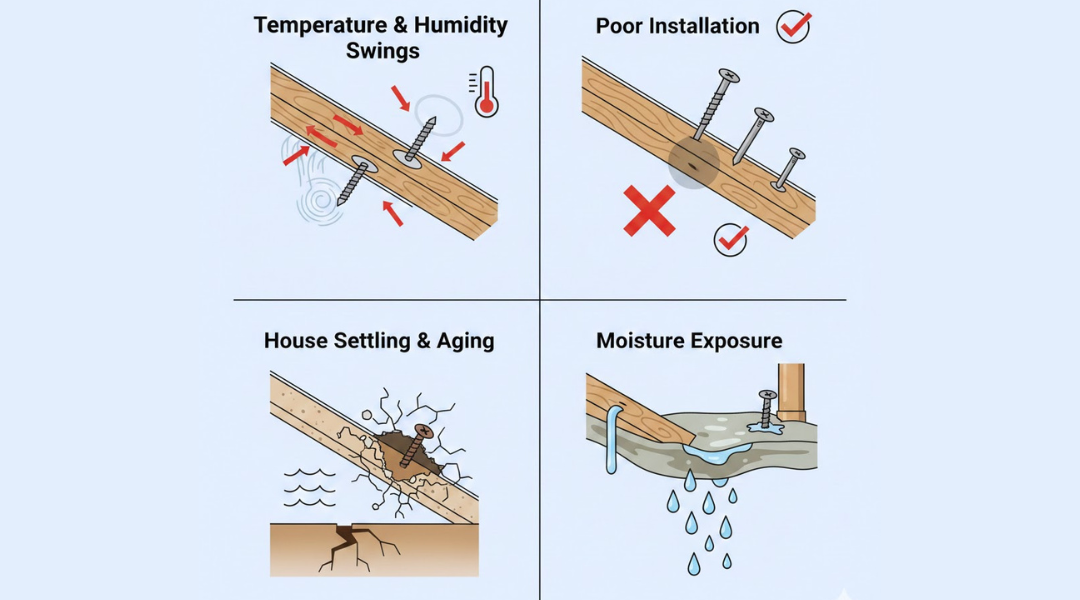
Poor installation techniques contribute to many nail pop problems. When nails aren’t driven at the correct angle or aren’t spaced properly, they can’t hold the drywall securely. Nails driven in too close to the edge of a joist are especially prone to popping.
The natural aging of your drywall also leads to nail pops. As the material ages, its adhesive properties weaken. The drywall loses its grip on the fasteners over time.
Your house settling creates additional stress on ceiling fasteners. As the foundation and framing adjust to their load, slight movements occur throughout the structure. These shifts can loosen nails that were once secure.
Moisture exposure weakens drywall and causes it to swell. When wet drywall dries, it shrinks and pulls away from fasteners. This cycle of expansion and contraction gradually works nails loose from their position.
Identifying and Assessing Damage
Before starting any ceiling repair, you need to determine what type of damage you’re dealing with and what’s causing it. A proper inspection helps you understand whether you have simple nail pops or signs of bigger problems like roof leaks or structural movement.
Visual Inspection Techniques
Walk through your room and look at the ceiling in different lighting conditions. Natural light from windows often shows imperfections better than artificial lighting. Small circular bumps or raised spots typically indicate nail pops.
Check these high-risk areas first:
- Corners where walls meet the ceiling
- Areas around ceiling joists
- Spots near windows and doors
- Sections around light fixtures and fans
Use a flashlight to inspect darker areas and corners. Hold the light at an angle to the ceiling surface to make small bumps more visible. Look for paint cracks, dents, or tiny holes where nails have pushed through the surface.
Take photos of damaged areas to track their size and location. Mark questionable spots with removable painter’s tape so you can monitor them over time.
Differentiating Nail Pops from Other Issues
Nail pops appear as small, round bumps about the size of a nail head. They feel firm when you press them and usually sit alone or in small clusters.
Water damage looks different. You’ll see:
- Yellow or brown stains
- Soft, spongy spots when pressed
- Peeling or bubbling paint
- Rings or dark patches
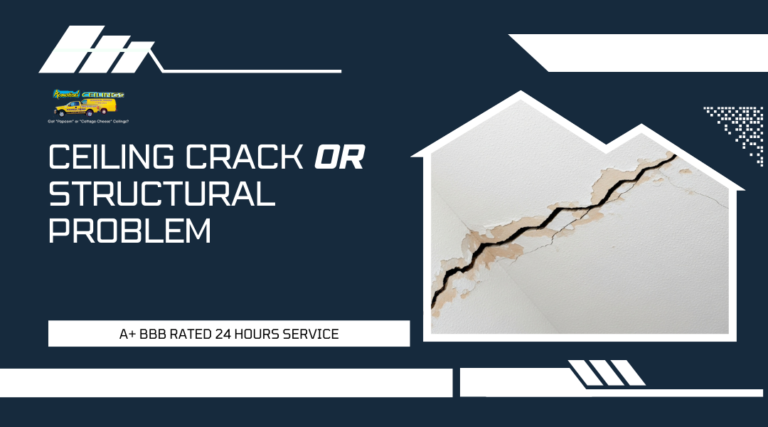
Cracks from house settling run in straight lines, often from corners outward. These cracks are wider than nail pops and may grow over time. Large cracks or sagging areas need professional evaluation before you attempt repairs.
If you find multiple nail pops along the same ceiling joists, this suggests movement in the framing. A single pop is usually safe to fix yourself. Groups of pops with cracks or sagging indicate structural issues that require expert assessment.
Evaluating Underlying Causes
Temperature fluctuations and humidity fluctuations cause wood framing to expand and contract. This movement pushes nails through the drywall surface over time. New homes experience more nail pops during their first few years as materials settle.
Check your attic for roof leaks before repairing ceiling damage. Look for water stains on rafters, wet insulation, or daylight coming through the roof. Moisture from leaks weakens drywall and creates conditions for repeated nail pops.
Feel the damaged area with your hand. A cool or damp spot suggests moisture problems above. Measure the depth of the pop by pressing gently around it. Pops less than 1/8 inch deep are minor. Deeper ones may need screws for better holding power.
Note when the damage appeared. Recent pops after construction or renovation are normal. New damage in an older home might signal ongoing structural movement that needs attention before you make repairs.
Essential Tools and Materials
Having the right tools and materials before you start makes the repair process faster and helps you avoid multiple trips to the hardware store. Quality supplies ensure your ceiling repairs last longer and look professional.
Must-Have Repair Tools
You need a hammer to drive popped nails below the surface. A drill is necessary to install drywall screws about an inch above and below each nail pop.
Safety equipment protects you during the repair. Wear safety glasses to shield your eyes from falling debris and dust. A pair of gloves keeps your hands clean and protected.
A drywall knife (also called a putty knife) applies and smooths compound over the repair area. Get one that’s 4 to 6 inches wide for best results. A sanding sponge or sandpaper smooths the dried compound before painting.
Keep a pencil handy to mark nail pop locations. A utility knife scrapes away loose paint and raised material around the problem area.
Choosing the Right Materials
Drywall screws should be 1.25 inches long so they penetrate the ceiling joist properly. Use coarse-thread screws for wood joists.
You can choose between joint compound and spackle for patching. Joint compound works better for larger repairs and provides a smoother finish. Spackle dries faster but works best on small areas.
Drywall fasteners secure the ceiling material to the joists and prevent future movement. Use screws instead of nails because they hold better and resist popping out.
Ceiling paint should match your existing finish. Flat or matte paint hides imperfections better than glossy finishes. Buy a small sample container to test the color match before painting the entire patched area.
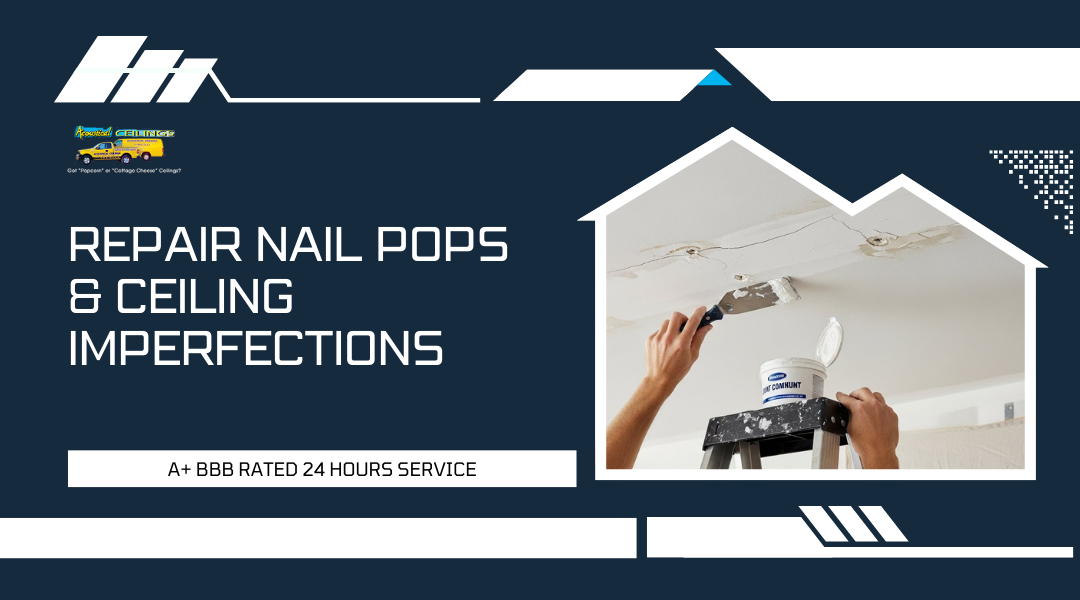
Step-by-Step Nail Pop Repair Process
Fixing nail pops requires securing the drywall back to the wood framing with screws, filling the damaged area with joint compound, and smoothing it to match your ceiling’s surface.
Preparing the Area
Start by putting on safety glasses to protect your eyes from falling debris. Clear the space below the repair area and lay down a drop cloth to catch dust and compound.
Use a drywall knife or putty knife to scrape away any loose paint or compound around the nail pop. Remove enough material to create a smooth, even surface around the damaged spot. Mark the location with a pencil so you can find the stud or joist behind the drywall.
Check if the nail head is visible or if you need to scrape away more material. Don’t hammer the popped nail back in, as this won’t solve the problem long-term.
Securing Loose Drywall
Drive two drywall screws into the wood framing near the popped nail. Place one screw about 1.5 inches above the nail and another 1.5 inches below it. The screws should be at least 1.25 inches long to penetrate the framing properly.
Tighten the screws until the drywall sits flush against the framing. Don’t over-tighten them or you’ll create dimples in the drywall surface.
Use a nail punch or hammer to drive the popped nail below the drywall surface. The nail head should sit slightly recessed so it won’t push through your patching work later.
Applying Joint Compound and Spackle
Scoop joint compound onto your drywall knife and spread it over the nail pop and screw heads. Press firmly to fill all gaps and create a smooth surface. Feather the edges by spreading the compound thin at the outer edges of your repair area.
Let the first coat dry completely. This usually takes 45 minutes to 24 hours depending on humidity and compound type.
Apply a second coat once the first is dry. Extend this coat slightly wider than the first to blend it with the surrounding ceiling. Some repairs need a third coat for a completely smooth finish.
Sanding and Finishing
Wait until the final coat is completely dry before sanding. Use a sanding sponge or fine-grit sandpaper (120 to 150 grit works well) to smooth the patched area. Sand in circular motions and blend the edges into the surrounding ceiling.
Wipe away dust with a damp cloth. Check the surface by running your hand over it or shining a light across it at an angle. Any bumps or ridges will show up clearly.
Prime the patched area before painting to prevent the compound from absorbing paint differently than the rest of your ceiling. Match your ceiling paint and apply two coats if needed for even coverage.
Painting and Blending Repairs
After sanding the joint compound smooth, painting ensures the repair blends with the rest of your ceiling. The right primer and paint application technique will make your fix invisible.
Priming the Patched Area
Apply primer to the repaired area before painting. Joint compound absorbs paint differently than drywall, which creates visible patches if you skip this step. Use a brush or small roller to cover the patched spot plus an inch or two beyond its edges.
Let the primer dry completely. Most primers dry in 1-2 hours, but check the product label for exact timing. The primer creates a uniform surface that helps ceiling paint adhere properly and look consistent.
Choose a primer that matches your repair type. Stain-blocking primers work best if you dealt with water damage. Standard drywall primer is fine for simple nail pops. A small can of primer costs $5-10 and covers many small repairs.
Achieving a Seamless Paint Finish
Match your ceiling paint exactly before you start. Take a paint chip from an inconspicuous area to the store for color matching. If your ceiling is old, the paint may have faded. You might need to repaint the entire ceiling for a perfect match.
Use the same paint sheen as your existing ceiling. Most ceilings use flat paint, which hides imperfections well. Apply thin coats rather than one thick coat to avoid drips and texture differences.
Feather the paint beyond the repair area. Start at the center and work outward with light strokes. This blending technique prevents visible edges where new paint meets old. Apply 2-3 thin coats, letting each dry completely. The repair should disappear into the surrounding ceiling when done correctly.
Preventing Future Nail Pops and Imperfections
You can avoid most nail pops by controlling the conditions that cause them and using the right installation methods. The main factors include managing wood movement, choosing proper fasteners, and keeping your ceiling in good condition.
Reducing Structural and Environmental Stress
Wood framing naturally expands and contracts as moisture levels change. This movement is the main cause of nail pops.
You should let new framing lumber sit inside your home for several weeks before installing drywall. This gives the wood time to adjust to indoor conditions. The wood will shrink less after installation, which puts less stress on the fasteners.
Temperature fluctuations and humidity fluctuations affect how much your wood framing moves. Try to keep your home at steady levels year-round. Indoor humidity should stay between 30% and 50%. Temperature should remain fairly constant.
Rapid changes in temperature or humidity cause more stress on drywall connections. This is especially true in new homes where lumber still has high moisture content.
Proper Fastener Selection and Installation
Using the right drywall fasteners prevents most nail pops. Screws work much better than nails for this home improvement project.
Drywall screws have threads that grip wood tightly. They resist the outward force when lumber shrinks. Use 1-1/4 inch screws for standard 1/2-inch drywall.
You need to install screws correctly for them to work properly:
- Drive screws straight into the center of studs or joists
- Create a small dimple without breaking the paper surface
- Space ceiling screws 12 inches apart
- Space wall screws 16 inches apart
The paper face of the drywall must stay intact. Broken paper reduces holding power and can lead to pops later. A screw gun with a depth-setting bit helps you get consistent results.
Regular Ceiling Maintenance
You should inspect your ceilings twice a year for small bumps or cracks. Catching problems early makes repairs easier.
Run your hand across the ceiling surface to feel for raised spots. Look for small circular bumps that indicate fastener problems. Mark any issues you find with a pencil.
Fix minor problems right away before they get worse. Small nail pops are easier to repair than large damaged areas. Check especially in the first two years after construction when wood framing does most of its shrinking.
Pay extra attention to ceilings below attics or crawl spaces. These areas often have bigger temperature and humidity changes. Watch for patterns of multiple nail pops in one area, which might indicate a larger structural issue.